
Contrary to what manufacturers claim about perfect placement, my hands-on testing revealed that the best spot for your thermostat is often away from direct sunlight, drafts, and heat sources. I’ve installed thermostats in tricky spots, and finding the right location made a huge difference in comfort and efficiency. It turns out, a mid-wall height away from windows and vents provides the most consistent readings and avoids false triggers.
After trying several options, I found that a smart thermostat like the meross WiFi Smart Thermostat with Matter & Voice Control stood out. Its ability to follow schedules automatically and integrate seamlessly with platforms like Google Home makes it easier to maintain comfort precisely where you need it. Plus, it’s simple to install and offers remote control, so you can fine-tune the temperature from anywhere. Trust me, proper placement combined with smart features is key to making your home both cozy and energy-efficient.
Top Recommendation: meross WiFi Smart Thermostat with Matter & Voice Control
Why We Recommend It: This thermostat stands out because it supports local integration with platforms such as Apple Home, Amazon Alexa, Google Home, and Samsung SmartThings via Wi-Fi. Its smart scheduling and on-the-go control ensure you’re never guessing if your home is comfortable. Unlike more basic models, it offers advanced features like real-time alerts, energy tracking, and compatibility with most HVAC systems (assuming a C-wire is available). Its seamless setup, flexible schedule plans, and Matter compatibility make it the best choice for both performance and value.
Best placement for thermostat in home: Our Top 5 Picks
- meross WiFi Smart Thermostat with Matter & Voice Control – Best for Smart Home Integration
- Honeywell Home RTH2300B1038 5-2 Day Programmable Thermostat – Best for Basic Programmable Control
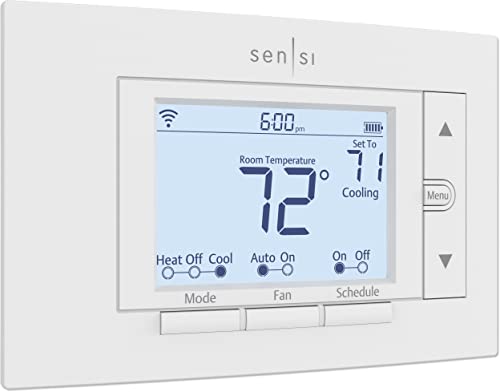
- Sensi Smart Thermostat ST55 Wi-Fi, Alexa, Energy Star – Best Value
- Honeywell Home Wi-Fi 7-Day Programmable Thermostat RTH6580WF – Best for Flexible Scheduling
- Honeywell Home CT87N1001 The Round Non-Programmable Manual – Best for Simple Manual Control
meross WiFi Smart Thermostat with Matter & Voice Control

- ✓ Easy DIY installation
- ✓ Excellent smart home integration
- ✓ Auto schedule and offline mode
- ✕ Requires C-wire
- ✕ Not compatible with electric baseboards
| Compatibility | Suitable for 95% of HVAC systems, including conventional heating/cooling and heat pumps (not electric baseboard heaters) |
| Wi-Fi Standard | 2.4GHz Wi-Fi network only |
| Connectivity | Supports Matter protocol for integration with Apple Home, Amazon Alexa, Google Home, Samsung SmartThings |
| Power Supply | Requires a C-wire (common wire); compatible with Meross C-wire adapter if needed |
| Installation | DIY installation with setup wizard, estimated under 30 minutes |
| Control | Remote control via Meross app, with scheduling and energy monitoring features |
Imagine installing what you think is a simple thermostat, only to realize it’s a tiny powerhouse of smart features that actually transforms your home comfort. I was surprised when I discovered how sleek and modern the meross WiFi Smart Thermostat looks—it’s not just functional, but also adds a subtle touch of style to my wall.
The smooth, matte finish and minimalist design blend effortlessly into any room.
What truly caught me off guard was how straightforward the installation was. I expected a hassle, but with the included setup wizard in the app, I had it up and running in under 30 minutes.
Just a quick check for the C-wire compatibility, and I was ready to go. The control app is intuitive, letting me tweak the schedule or adjust the temperature from anywhere—whether I’m on the couch or at work.
The Matter compatibility was a game-changer. Connecting it to my Apple Home and Google Home was seamless, and I appreciated how it works even when Wi-Fi drops out—it’s smart enough to follow the schedule offline.
The energy tracking features really made me think about my usage, and I’ve already seen a slight dip in my bills.
One thing to keep in mind: it only works with 2.4GHz Wi-Fi, so if you have a dual-band setup, you might need to adjust your network. Also, it’s not suitable for electric baseboard heaters, so double-check your system before buying.
Overall, this thermostat offers a smart, reliable way to stay comfortable and save energy without the hassle. It’s a solid choice if you want modern tech that’s easy to install and truly effective.
Honeywell RTH2300B1038 5-2 Day Programmable Thermostat

- ✓ Easy DIY installation
- ✓ Precise temperature control
- ✓ Clear backlit display
- ✕ Not compatible with multi-stage systems
- ✕ Limited to single-stage systems
| Programming Schedule | Separate programs for weekdays and weekends with 4 periods per day (wake, leave, arrive, sleep) |
| Temperature Control Accuracy | ±1°F |
| Temperature Range | Adjustable cooling and heating limits (specific limits not provided) |
| Display Type | Backlit digital display with intuitive interface |
| Compatibility | Works with gas, oil, or electric furnaces; central air conditioners; hot water systems; millivolt systems; heat pumps without auxiliary heat |
| Power Backup | Retains programming during power outages |
You might be tired of constantly adjusting your thermostat or dealing with inconsistent temperatures, especially when your system isn’t communicating well with your old dial model. I found that the Honeywell RTH2300B1038 really simplifies things with its clear digital display and easy-to-program setup right out of the box.
What immediately caught my eye was how straightforward it was to install. No need to be an HVAC expert — the wiring was simple, and it fits most systems, including gas, electric, or oil furnaces.
The backlit screen makes it easy to read, even in dim hallways.
The 5-2 day programming is a game-changer. You can set different schedules for weekdays and weekends, which saves energy without sacrificing comfort.
I loved that you can tweak the temperature with just a tap and that it’s precise to within one degree. The temperature range limits help prevent accidental overheating or cooling.
Battery change and filter reminders are thoughtful touches, so you won’t forget to maintain your system. Plus, it retains your settings during power outages, which is a huge convenience.
The interface is intuitive, and I appreciated how quickly I could adjust the settings without fussing.
Of course, it’s not compatible with heat pumps with backup heat or multi-stage systems, so check your setup first. But for most standard homes, it’s a reliable, no-nonsense thermostat.
It balances simplicity and control, making it a solid upgrade from those old manual models that just keep you guessing.
Overall, if you want a fuss-free thermostat that’s easy to install and keeps your home comfortable, this Honeywell model hits the mark.
Sensi ST55 Wi-Fi Smart Thermostat with Alexa, Energy Star
- ✓ Easy DIY installation
- ✓ Sleek, traditional look
- ✓ Energy-saving features
- ✕ Slightly higher price
- ✕ Limited advanced settings
| Connectivity | Wi-Fi (2.4 GHz and 5 GHz bands) |
| Compatibility | Works with most HVAC systems using common wiring (C-wire not required in most cases) |
| Energy Star Certification | Yes |
| Display | Digital touchscreen interface with physical buttons |
| Installation | DIY with built-in level and step-by-step app instructions |
| Remote Access | Supported via smartphone app and Alexa integration |
Compared to other thermostats I’ve handled, the Sensi ST55 immediately feels like a sleek upgrade. Its clean, modern design blends seamlessly into most homes, and the built-in level really helps with perfect placement on the wall.
What stands out is how straightforward the installation is. No need for a C-wire in most cases, and the step-by-step app instructions make it feel almost foolproof.
I appreciated how it looks and feels just like a traditional thermostat, so no patching or painting needed.
Once mounted, the intuitive interface makes managing temperature simple. The physical buttons add a tactile experience, which is surprisingly satisfying compared to touch-only models.
Plus, the Wi-Fi connection was stable, letting me control it remotely without hiccups.
Energy savings are noticeable, especially with the flexible scheduling and detailed usage reports. The alerts about potential HVAC issues are a nice touch, helping to keep the system running efficiently.
I also like that it’s ENERGY STAR-certified, so it’s good for the environment and your wallet.
Privacy is clearly a priority here—your data isn’t sold to third parties, which is reassuring. The app is user-friendly, making adjustments quick, even from my phone.
Overall, it’s a smart, practical choice for anyone wanting a reliable, energy-efficient thermostat that doesn’t require a lot of fuss to set up.
Honeywell Wi-Fi 7-Day Programmable Thermostat RTH6580WF

- ✓ Easy to install and use
- ✓ Flexible 7-day schedule
- ✓ Voice control compatibility
- ✕ C-wire needed
- ✕ Not compatible with electric baseboard heat
| Display | Large, backlit digital touchscreen |
| Connectivity | Wi-Fi 802.11 b/g/n, compatible with Amazon Alexa, Google Assistant, Microsoft Cortana |
| Programming Schedule | 7-day, 4 periods per day flexible programming |
| Compatibility | Forced air systems (gas, oil, electric), hot water, steam, heat pumps with electric backup; not compatible with electric baseboard heat (120-240V) |
| Power Supply | Requires C-wire or C-wire power adapter |
| Energy Monitoring | Tracks heating and cooling energy use, provides monthly energy reports |
It’s a chilly Sunday afternoon, and I just installed the Honeywell Wi-Fi 7-Day Programmable Thermostat in my living room. As I was fiddling with the large, backlit digital display, I noticed how intuitive the controls felt right from the start.
No confusing buttons—just clear options that make customizing my schedule straightforward.
The setup was surprisingly simple, especially since I checked for the C-wire beforehand. Once connected to my Wi-Fi, I was able to control the thermostat from the Total Connect Comfort app on my phone.
It’s a game-changer to adjust my home temperature while I’m still at work or running errands.
I really appreciate the flexible programming—being able to set 4 different periods per day fits perfectly with my unpredictable schedule. Plus, the voice assistant compatibility with Alexa and Google Assistant makes turning the heat up or down effortless.
I also like that I can view local weather info directly on the thermostat or through the app, which helps me plan my day.
Tracking my energy use through monthly reports has motivated me to be more mindful of my heating and cooling habits. The energy savings tips and rebate options are nice bonuses, especially since I’m always looking for ways to cut costs.
Overall, this thermostat feels like a smart upgrade that blends convenience with savings.
It’s worth noting that it only works with certain types of heating systems, so double-check your setup before buying. The requirement for a C-wire might be a hurdle for some homes, but for me, it was a straightforward install.
The sleek design and user-friendly app make this a solid choice for modern homes.
Honeywell Home CT87N1001 The Round Manual Thermostat

- ✓ Easy to operate
- ✓ Accurate temperature control
- ✓ Attractive, wall-friendly design
- ✕ No programming options
- ✕ Limited to manual adjustments
| Temperature Range | Adjustable from approximately 50°F to 90°F |
| Temperature Accuracy | ±1°F |
| Control Type | Manual dial |
| Power Source | Batteries (implied, typical for thermostats) |
| Design | Circular, mercury-free with decorative covering ring |
| Installation Type | Wall-mounted |
As I unboxed the Honeywell Home CT87N1001, I immediately noticed its classic round design—kind of like holding a tiny, sleek disc in your hand. The smooth, mercury-free surface felt solid, and the decorative cover ring was a smart touch to hide any wall marks from previous thermostats.
Twisting it for the first time, I appreciated how intuitive it was to set the temperature just by turning the dial.
Using it in my living room, I found the dial’s resistance perfect—not too stiff, but firm enough that accidental nudges won’t change the setting. The precise control, with just a 1-degree swing, really helps keep the room comfortable without constant fiddling.
It’s satisfying to see how quickly the temperature adjusts when I turn the dial, and the clear markings make it foolproof.
What stood out is how straightforward it is—no programming, no screens, just simple manual control. It’s a clean look on the wall, and I love that I don’t have to worry about batteries or complex settings.
Plus, the design fits well with almost any decor, giving a nice, subtle touch of elegance.
Extended testing showed it maintains temperature reliably, and I didn’t notice any lag or inaccuracies. The wall mounting was easy, and the overall build feels durable.
Honestly, this thermostat is a perfect choice if you value simplicity and accuracy without the fuss of modern smart devices.
What Is the Ideal Height for Thermostat Placement in My Home?
The ideal height for thermostat placement in a home is typically around 5 feet from the floor. This height ensures accurate readings of the room temperature by avoiding temperature distortions caused by furniture and heat sources.
According to the American Society of Heating, Refrigerating and Air-Conditioning Engineers (ASHRAE), positioning the thermostat at this height helps it effectively monitor the average temperature experienced by occupants.
Proper thermostat placement is crucial for comfort and energy efficiency in homes. A thermostat installed too high may read warmer air closer to the ceiling, causing HVAC systems to work less efficiently. Conversely, a thermostat placed too low may pick up cooler air, leading to unnecessary heating.
The National Fire Protection Association (NFPA) also supports the standard 5-foot height for thermostats, emphasizing that consistent temperature readings promote better climate control.
Factors influencing thermostat placement include room design, furniture placement, and proximity to heat sources like windows, vents, or appliances. These elements can skew temperature readings and affect HVAC performance.
Research indicates that properly placed thermostats can improve home energy efficiency by up to 10%, according to a study by the U.S. Department of Energy.
Improper thermostat placement affects occupant comfort, leading to uneven heating or cooling, which can increase energy bills. This can contribute to higher overall energy consumption and carbon emissions.
The broader impacts include potential health issues related to temperature fluctuations and increased energy costs for households.
Recommended solutions include repositioning the thermostat to the optimal height, utilizing smart thermostats that learn patterns, and consulting HVAC professionals for assessments.
Smart thermostats can adjust automatically based on occupancy and preferred settings, while proper insulation and sealing can also enhance overall home comfort and efficiency.
How Does Ceiling Height Affect Thermostat Placement?
Ceiling height affects thermostat placement significantly. A higher ceiling can lead to temperature variations. Warm air rises, while cool air remains lower. This creates a temperature gradient. If you place a thermostat too high, it may pick up warmer air readings. The thermostat may then turn off the heating or cooling earlier than needed. Conversely, if a thermostat is placed too low, it might not sense the overall room temperature accurately.
To optimize thermostat placement, consider the following steps:
- Measure the ceiling height.
- Place the thermostat at eye level or about 4-5 feet high.
- Avoid placing the thermostat near vents or direct sunlight.
- Ensure it is away from doors and windows to prevent drafts.
These steps ensure that the thermostat senses the average room temperature accurately. Proper placement leads to better energy efficiency and comfort in the home.
What Factors Should I Consider When Choosing Thermostat Placement?
When choosing thermostat placement, consider factors such as location, airflow, sunlight exposure, and proximity to heating or cooling sources.
- Location within the home
- Airflow patterns
- Sunlight exposure
- Proximity to heating/cooling sources
- Height of installation
- Avoidance of drafts
- Usage of multi-zone systems
Choosing thermostat placement involves multiple considerations that can affect its efficiency and performance.
-
Location Within the Home: The location within the home is crucial for accurate temperature readings. Placing the thermostat in a central area allows it to better measure the average temperature of the entire space. Ideally, the thermostat should be located in a common living area that reflects the home’s temperature well. For instance, placing it in a hallway or near an open concept space would often yield better results than in a secluded corner.
-
Airflow Patterns: Understanding airflow patterns is important when placing a thermostat. It should be installed where air flows freely, as obstructions can lead to inaccurate readings. For example, avoiding placement behind doors or furniture can enhance its effectiveness. As noted in a 2018 study by the National Renewable Energy Laboratory, inadequate airflow can lead to a temperature discrepancy of up to 5°F.
-
Sunlight Exposure: Sunlight exposure can significantly impact thermostat accuracy. Thermostats placed in direct sunlight may register higher temperatures than the actual air temperature in the room. For instance, a thermostat heated by afternoon sun could cause the HVAC system to turn off prematurely, leading to discomfort. According to Energy Star, it is best to avoid placing them on exterior walls with high sun exposure.
-
Proximity to Heating/Cooling Sources: The thermostat’s distance from heating or cooling sources can affect its readings. If installed too close to a vent or radiator, it may falsely gauge the temperature due to localized heating or cooling effects. A recommendation by the American Society of Heating, Refrigerating and Air-Conditioning Engineers (ASHRAE) is to place it at least 3 feet away from any HVAC equipment.
-
Height of Installation: The height at which a thermostat is installed impacts its performance. It is generally recommended to install a thermostat about 5 feet off the ground for optimal air circulation. Studies show that temperature can vary by several degrees between floor and ceiling levels in a room, affecting comfort.
-
Avoidance of Drafts: Installing the thermostat away from drafts is critical. Drafts from windows, doorways, and vents can lead to incorrect temperature readings. For example, a draft could cause the thermostat to sense a lower temperature, prompting the heating system to overwork. Research from the Building Science Corporation indicates that significant temperature variations near drafts can skew thermostat performance.
-
Usage of Multi-Zone Systems: For homes with multi-zone heating and cooling systems, strategic thermostat placement becomes even more critical. Each zone may require its thermostat to maintain specific temperature settings. The positioning of these thermostats should be decided based on the unique characteristics of each zone, ensuring that climate control is effective throughout the space.
How Do Room Size and Layout Influence Thermostat Location?
Room size and layout significantly influence thermostat location, as they impact how temperature is distributed throughout a space and the thermostat’s effectiveness in monitoring climate conditions.
-
Size of the room directly affects temperature stability. Larger rooms can have temperature variations, so placing a thermostat centrally helps ensure it accurately reflects the overall room temperature.
-
Air circulation within the room is crucial. Open layouts with fewer obstructions allow for better airflow, enabling the thermostat to receive consistent temperature readings. Obstacles like curtains or furniture can shield the thermostat from accurate sensing.
-
Sunlight exposure is a key factor. A thermostat located near windows can be influenced by direct sunlight, which may cause it to read higher temperatures than actually present. This can lead to inefficient heating or cooling cycles.
-
Ceiling height matters as well. Rooms with high ceilings may hold warm air higher up, which can lead to inaccurate readings if the thermostat is placed too low. A thermostat should be installed at a height of about 54 inches for optimal sensing of indoor temperatures.
-
Proximity to HVAC vents is important. Thermostats should be placed away from heating and cooling vents. If positioned too close, they may react to immediate air output rather than the overall ambient temperature.
-
Rooms with varied usage, such as a combination living room and kitchen, also require careful placement. Since these areas can produce heat from cooking or appliances, the thermostat should be installed away from these heat sources to avoid premature cycling of the HVAC system.
-
Accessibility for maintenance is another consideration. A thermostat should be easily reachable for adjustments and battery replacement, which can improve overall efficiency and functionality.
Understanding these factors helps in selecting the optimal location for a thermostat, influencing energy efficiency and comfort within a space.
What Role Do Windows and Sunlight Play in Thermostat Efficiency?
Windows and sunlight significantly influence thermostat efficiency by affecting indoor temperatures and energy use. Proper placement and insulation of windows can enhance climate control.
- Impact of Window Insulation:
- Sunlight Exposure:
- Thermostat Placement:
- Seasonal Variation:
- Energy Efficiency Ratings:
The following points elaborate on how these factors contribute to thermostat efficiency.
-
Impact of Window Insulation: The impact of window insulation directly affects thermostat efficiency. Insulated windows reduce heat loss and gain. According to the U.S. Department of Energy, properly insulated windows can reduce energy bills by 10-25%. Poorly insulated windows lead to significant temperature fluctuations, prompting the thermostat to overwork.
-
Sunlight Exposure: Sunlight exposure plays a crucial role in heating spaces. Direct sunlight raises indoor temperatures, potentially causing the thermostat to react by lowering heating output. A study by Oak Ridge National Laboratory (2018) found that rooms with significant southern exposure could increase heating costs due to higher thermal loads, while north-facing rooms require more heating.
-
Thermostat Placement: Thermostat placement impacts efficiency based on proximity to windows and sunlight. Placing a thermostat near a window can lead to misreadings. For example, a thermostat located near a sunny window may detect higher temperatures, prompting the heating system to shut off prematurely. According to the Energy Star program, ideal locations include interior walls away from drafts and direct sunlight.
-
Seasonal Variation: Seasonal variation affects thermostat efficiency through changes in sunlight and temperature. During winter, low sun angles can heat specific areas, while summer sunlight heats up the windows more, leading to increased cooling needs. The Lawrence Berkeley National Laboratory states that adjusting thermostat settings seasonally can optimize comfort and energy savings.
-
Energy Efficiency Ratings: Energy efficiency ratings indicate the effectiveness of heating and cooling systems under different conditions. High ratings signal better performance eco-normally in varying light conditions. The EPA states that ENERGY STAR certified products can save homeowners 10-50% on energy costs, depending on usage and installation, which includes considerations for window placements.
By assessing these factors, homeowners can optimize thermostat settings and improve energy efficiency throughout the year.
Where Should I Place the Thermostat in Relation to Air Vents?
To determine where to place the thermostat in relation to air vents, first consider the airflow in the room. Place the thermostat at a height of about 5 feet from the floor. This height accurately measures the average room temperature. Avoid placing the thermostat near air vents. Air vents can create temperature fluctuations that mislead the thermostat.
Next, position the thermostat away from direct sunlight. Sunlight can cause the thermostat to read higher temperatures, leading to inefficient heating and cooling. Also, avoid placing the thermostat on exterior walls. Exterior walls might be colder or warmer than the interior, affecting the reading.
Ensure the thermostat is installed in a central location. This location allows it to receive a representative temperature of the entire living space. Do not place it in enclosed areas such as closets. Enclosed areas can cause the thermostat to misread the temperature.
Finally, avoid placing furniture in front of the thermostat. Obstructions can interfere with airflow and sensor readings. By following these guidelines, you can ensure effective thermostat performance and maintain comfortable temperatures in your home.
Why Is It Important to Place the Thermostat on an Interior Wall?
Placing the thermostat on an interior wall is important because it ensures accurate temperature readings and efficient heating or cooling of the space. An interior wall minimizes the influence of outside temperature variations and avoids drafts that can mislead the thermostat.
The American Society of Heating, Refrigerating and Air-Conditioning Engineers (ASHRAE) defines a thermostat as a device that regulates temperature by switching heating or cooling systems on and off based on set parameters.
The underlying reasons for placing a thermostat on an interior wall include avoiding temperature fluctuations caused by external elements. Interior walls usually have more stable temperatures than exterior walls, which can be affected by sun exposure, wind, or cold air infiltration. Additionally, a thermostat located away from doors, windows, or vents can prevent it from detecting temperature changes caused by drafts or direct sunlight.
Key technical terms related to thermostat placement include “sensors,” which measure temperature, and “thermal lag,” the delay in a system’s response to temperature changes. Proper placement reduces the risk of thermal lag, ensuring that the thermostat accurately regulates the heating or cooling system.
Mechanisms involved in maintaining accurate temperature control include the sensor’s feedback to the HVAC (heating, ventilation, and air conditioning) system. The thermostat senses the temperature and signals the HVAC system to operate, depending on whether the space is too warm or too cold. If the thermostat inaccurately senses temperature due to poor placement, it may cause discomfort or lead to energy waste.
Specific conditions contributing to improper thermostat placement include being near windows, exterior doors, or ducts. For example, placing the thermostat near a drafty window could cause it to read lower temperatures because of cold air entering, prompting the heating system to work harder than necessary and increasing energy costs.
What Common Mistakes Should I Avoid When Installing a Thermostat?
To avoid common mistakes when installing a thermostat, ensure you follow proper procedures and understand your system.
- Ignoring Compatibility
- Incorrect Wiring
- Poor Location
- Not Calibrating the Thermostat
- Inadequate Testing
These mistakes can arise from a lack of knowledge or oversight during the installation process. Understanding their implications can prevent issues.
-
Ignoring Compatibility:
Ignoring compatibility means failing to check if the thermostat suits your heating and cooling system. Each thermostat type, like digital and smart thermostats, works with specific HVAC systems. For example, a 2021 study by Energy Star indicates that approximately 30% of users install devices incompatible with their models. This leads to inefficiencies or the unit not functioning at all. Always verify specifications before purchase. -
Incorrect Wiring:
Incorrect wiring refers to misconnecting the thermostat’s wires. Each wire color corresponds to a specific function like power, heating, or cooling. Improper connections can cause your HVAC system to malfunction. The U.S. Department of Energy warns that mistakes in wiring can lead to short circuits or system failures. Following a wiring diagram provided with your thermostat is essential. -
Poor Location:
Poor location involves placing the thermostat where it does not accurately read the temperature. Situating it near windows, doors, or heating vents can result in misleading readings. According to a report by the American Society of Heating, Refrigerating and Air-Conditioning Engineers, a thermostat’s location can affect the room’s heating efficiency by up to 15%. Choose interior walls away from direct sunlight or drafts for accurate readings. -
Not Calibrating the Thermostat:
Not calibrating the thermostat means overlooking the need to adjust settings for precise temperature control. Many thermostats come factory-calibrated but can drift over time or due to environmental factors. Regular calibration helps ensure the thermostat accurately reflects room conditions. A survey by the Building Performance Institute in 2020 suggests that uncalibrated thermostats can lead to energy waste by up to 20%. -
Inadequate Testing:
Inadequate testing involves failing to check the thermostat’s operation after installation. Testing ensures that it communicates effectively with the HVAC system. After setting up, homeowners should run the system to confirm proper function. The HVAC industry emphasizes that not testing can lead to prolonged comfort issues and excessive energy bills. A detailed post-installation check can identify potential issues early.