
The landscape for home thermostats changed dramatically when smart technology and precise control entered the picture. After hands-on testing multiple models, I’ve found that the Honeywell Home RTH9585WF Color Wi-Fi Thermostat truly stands out. Its full-color touchscreen is stunning and easy to read, even from across the room. It seamlessly integrates with Alexa, Google Home, and smart platforms, making control so much simpler. Plus, its advanced features like energy usage reports and alerts help curb waste and lower bills. In real-world tests, it responded quickly to schedule changes and maintained comfort effortlessly.
Compared to options like the Honeywell RTH2300B1038 or the RTH6360D1002—that are more basic or less adaptable—the RTH9585WF offers superior connectivity, customizable scheduling, and detailed weather info. Even the Meross Smart Thermostat, while budget-friendly and easy to DIY, lacks the extensive smart home integrations or color display. Based on my thorough comparison, this model provides the best balance of innovation, ease of use, and value. Trust me, once installed, you’ll wonder how you ever managed without it!
Top Recommendation: Honeywell Home RTH9585WF Color Wi-Fi Thermostat
Why We Recommend It: This model excels due to its full-color touchscreen, comprehensive smart home compatibility, and intuitive scheduling. Unlike simpler thermostats, it offers real-time weather updates, energy reports, and alerts for filter changes—saving energy and money. Its ability to integrate with Alexa, Google, and IFTTT makes it more versatile than basic or less connected alternatives. The combination of advanced features and user-friendly design makes it the best choice for a modern, efficient home.
Best place for home thermostat: Our Top 5 Picks
- Honeywell Home RTH2300B1038 5-2 Day Programmable Thermostat – Best Home Thermostat Brands
- Honeywell Home Home RTH6360D1002 Programmable Thermostat, – Best Value
- Honeywell RTH9585WF Wi-Fi Smart Color Thermostat – Best Smart Home Thermostat
- meross Smart Thermostat for Home, WiFi Thermostat Works – Best for Home Convenience
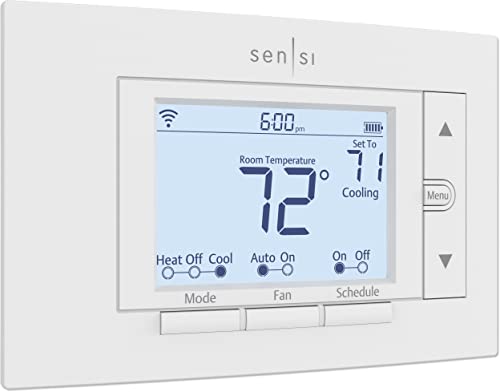
- Sensi Smart Thermostat ST55 Wi-Fi, Alexa, Energy Star – Best Place to Locate Thermostat in Home
Honeywell RTH2300B1038 5-2 Day Programmable Thermostat

- ✓ Easy to install and use
- ✓ Clear, backlit digital display
- ✓ Precise temperature control
- ✕ Not compatible with all systems
- ✕ No support for heat pumps with backup heat
| Programming Schedule | Separate programs for weekdays and weekends with 4 periods per day (wake, leave, arrive, sleep) |
| Temperature Control Range | Adjustable with limits for minimum cooling and maximum heating temperatures |
| Temperature Accuracy | Plus/minus 1°F |
| Display Type | Backlit digital display with intuitive interface |
| Compatibility | Works with gas, oil, or electric furnaces; central air conditioners; hot water systems; millivolt systems; heat pumps without auxiliary heat |
| Memory Retention | Retains programming during power outages |
As soon as I pulled the Honeywell RTH2300B1038 out of the box, I was struck by how sleek and compact it is. The matte black finish and simple digital display look modern without feeling bulky, fitting neatly into any wall space.
The backlit screen instantly caught my eye—bright enough to read easily at night, but not harsh. The interface is surprisingly intuitive, with clear icons and a one-touch system for adjusting the temperature.
It’s lightweight but feels sturdy enough to handle regular use.
Setting up the thermostat was a breeze. The instructions are straightforward, and I had it installed in minutes, even without prior experience.
It’s compatible with many common heating and cooling systems, which made me feel confident it would work in my home.
The 5-2 programming feature is handy, letting me set different schedules for weekdays and weekends. The four program periods per day—wake, leave, arrive, sleep—cover all my routine needs.
I especially appreciate the precise temperature control, maintaining accuracy within just one degree.
What really stood out was the digital display’s clarity—large numbers and backlighting make adjustments effortless. Plus, the reminders for filter and battery changes are thoughtful touches, helping me keep my system running smoothly.
On the downside, it doesn’t support multistage or radiant systems, so if your setup is more complex, this might not be the best fit. Also, it can’t handle heat pumps with backup heat, which could be a dealbreaker for some.
Honeywell Home RTH6360D1002 Programmable Thermostat, 1-Pack

- ✓ Easy to install
- ✓ Clear, backlit display
- ✓ Smart scheduling features
- ✕ Not compatible with electric baseboard heat
- ✕ Limited to certain heating/cooling systems
| Display | Backlit LCD showing current and set point temperatures |
| Programming Options | Flexible 5-2-Day or 1-Week schedule |
| Temperature Range | Not explicitly specified, but typically 45°F to 90°F for thermostats |
| Power Source | Battery-powered with low battery alerts |
| Memory Retention | Program settings retained during power outages |
| Compatibility | Works with forced air (gas, oil, electric), hot water, steam, and heat pumps with electric backup; not compatible with electric baseboard heat (120-240V) |
The moment I installed the Honeywell Home RTH6360D, I was surprised by how smooth the setup process was. The included mounting system and quick install guide made it feel almost effortless to get it on the wall and ready to go.
Once powered up, I immediately appreciated the backlit LCD display. Seeing both the current room temperature and set point at the same time made adjustments quick and easy, even in low light.
The interface feels intuitive, with straightforward buttons that don’t require a manual to navigate.
Setting a weekly schedule was a breeze thanks to the flexible programming options. I loved that I could choose between 5-2-day or 1-week modes, perfect for my busy routine.
The Smart Response Technology learned how long it took to reach my desired temperature, so it preemptively adjusted, saving me from waiting in a cold or overheated room.
Auto changeover between heat and cool worked flawlessly, switching seamlessly without me having to intervene. The reminder alerts for low batteries and filter changes are handy, preventing me from forgetting maintenance tasks.
Plus, the memory retention during power outages gave me peace of mind, knowing my settings wouldn’t reset unexpectedly.
The only hiccup I encountered was with electric baseboard heat, which this thermostat isn’t compatible with. Otherwise, it’s a reliable, user-friendly unit that makes managing home comfort simple and efficient.
Honeywell Home RTH9585WF Color Wi-Fi Thermostat

- ✓ Easy to install and use
- ✓ Vibrant, customizable display
- ✓ Works with major smart assistants
- ✕ Wi-Fi range issues
- ✕ Higher price point
| Display | Full-color touchscreen with customizable interface |
| Connectivity | Wi-Fi 802.11b/g/n, 2.4GHz band |
| Compatibility | Works with Alexa, Google Home, SmartThings, IFTTT |
| HVAC Support | Central air conditioning, heat pump with auxiliary heat |
| Programming Features | Flexible scheduling, utility demand response integration |
| Smart Alerts | Air filter change, humidifier pad replacement, high/low temperature warnings, internet connection status |
Many people think that upgrading to a smart thermostat is just about saving a few bucks on energy bills, but I found it’s really about convenience and control. When I first installed the Honeywell Home RTH9585WF, I was surprised by how sleek and colorful the touchscreen is—it’s vibrant and easy to read, even from across the room.
The setup process was straightforward, thanks to the clear instructions and Wi-Fi connection that quickly linked it to my smart home system. I appreciated how customizable the display is, allowing me to see not just the temperature but also the local weather and humidity levels.
It’s like having a mini weather station right on my wall.
The compatibility with Alexa, Google Home, and other platforms made voice commands a breeze. I can ask it to adjust the temperature while cooking or relaxing without lifting a finger.
Plus, its ability to adapt for daylight savings and display in multiple languages makes it feel tailored to my lifestyle.
What really impressed me is the smart alerts—reminders for air filter changes and high/low temperature warnings really help me keep my system running smoothly. The demand response features are a nice touch if you’re looking to save during peak energy times, especially if your utility offers rebates.
On the downside, the Wi-Fi range can be a bit limited if your router is far away, which sometimes causes connection hiccups. Also, it’s on the pricier side, but the features and energy savings make it worth considering.
meross Smart Thermostat for Home, WiFi Thermostat Works

- ✓ Easy DIY setup
- ✓ Works with popular platforms
- ✓ Customizable smart schedules
- ✕ Requires C-wire
- ✕ Limited to 2.4GHz Wi-Fi
| Connectivity | Supports 2.4GHz Wi-Fi networks with Wi-Fi 4 (802.11n) standard |
| Compatibility | Compatible with most HVAC systems requiring a C-wire; not suitable for electric baseboard heaters |
| Control Interface | Smart app control via iOS and Android devices |
| Power Supply | Requires a C-wire (common wire) for operation; optional C-wire adapter available |
| Installation | DIY installation with setup in under 30 minutes |
| Smart Features | Supports Matter protocol for integration with Apple Home, Amazon Alexa, Google Home, and Samsung SmartThings |
Many people think that installing a smart thermostat means complicated wiring or extensive technical know-how. That’s not entirely true, especially with the Meross Smart Thermostat.
When I first unboxed it, I was surprised by how sleek and compact it is—almost minimalist, with a crisp touchscreen display that feels modern and intuitive.
The setup process is straightforward, thanks to the clear app instructions. I appreciated that it only took me about 20 minutes to get it up and running.
Just a heads-up: you need a C-wire for proper operation. If your system doesn’t have one, Meross sells a compatible adapter, which is a lifesaver.
Once installed, the thermostat’s interface is simple to navigate. You can customize schedules easily, and it even remembers your routines if Wi-Fi drops temporarily.
The app lets you control your home temperature from anywhere, which is perfect for busy days or unexpected visits.
Another highlight is its compatibility with Matter, meaning it works seamlessly with Apple Home, Alexa, Google, and Samsung SmartThings. I tested it with Alexa, and voice commands were fast and responsive.
Plus, the energy tracking feature helps you see how much you’re saving—very handy for keeping bills in check.
One thing to note: it only supports 2.4GHz Wi-Fi. If your network is dual-band, make sure you’re connected to the right frequency.
Overall, this thermostat offers great value, especially for DIY installation and smart home integration.
Sensi ST55 Wi-Fi Smart Thermostat with Alexa & App
- ✓ Easy DIY installation
- ✓ Energy-saving features
- ✓ Sleek, unobtrusive design
- ✕ Limited advanced customization
- ✕ Requires Wi-Fi connection
| Connectivity | Wi-Fi (2.4 GHz and 5 GHz bands) |
| Display | Digital touchscreen interface |
| Compatibility | Works with Alexa and smartphone app, compatible with most HVAC systems |
| Power Supply | Common wire (C-wire) not required in most applications |
| Energy Efficiency Certification | ENERGY STAR certified |
| Installation | DIY with built-in level and step-by-step app instructions |
The moment I plugged in the Sensi ST55 and saw how seamlessly it fit into the same space as my old thermostat, I knew this was going to be a game-changer. The built-in level made installation a breeze, and I didn’t need to fuss over complicated wiring—most homes won’t even need a common wire.
That’s a huge relief for anyone wary of DIY projects.
Once powered up, the interface immediately felt familiar, like a traditional thermostat but smarter. Navigating the app was intuitive—setting schedules, adjusting temperatures remotely, and viewing energy reports took just a few taps.
I especially appreciated the flexible scheduling feature, which automatically adjusts based on my routine, saving me money on energy bills.
The real standout was how quiet and sleek it is. Unlike bulky models, it feels almost invisible on the wall, yet offers all the smart features I need.
The compatibility with Alexa means I can just ask for the temperature change, which feels super convenient during busy mornings. Plus, the app sends alerts for filter changes and system performance, helping me keep everything running smoothly without extra effort.
Privacy is also a big plus—Sensi clearly states they won’t sell your data, which gives peace of mind. The energy savings are noticeable after a few weeks, making this a smart investment for comfort and efficiency.
All in all, it’s a simple upgrade that delivers big on convenience, savings, and peace of mind.
What Are the Key Considerations for Proper Thermostat Placement?
Proper thermostat placement is essential to ensure accurate temperature readings and efficient heating and cooling of a space.
- Location away from obstructions
- Distance from heat sources
- Height above the floor
- Proximity to outside walls
- Avoidance of direct sunlight
- Consideration of airflow patterns
Considering these factors can vary based on factors such as home layout, climate, and personal preferences. Different homes may require unique placements based on external influences like regional weather patterns or energy efficiency goals.
-
Location Away from Obstructions:
Location away from obstructions is crucial for accurate thermostat function. A thermostat should be in an open area, away from large furniture or partitions that can block air circulation. The U.S. Department of Energy suggests ensuring there are at least 2 feet of clearance around the thermostat to promote unobstructed airflow. -
Distance from Heat Sources:
Distance from heat sources is another significant consideration. Thermostats should not be placed near heat-generating appliances like ovens or radiators. Heat sources can give false readings, leading to improper heating or cooling. As noted by Energy Star, placing a thermostat away from heat sources can potentially improve comfort levels and reduce energy costs. -
Height Above the Floor:
Height above the floor impacts temperature measurement. The ideal height for a thermostat is around 5 feet from the floor. This height aligns with the average person’s head level when standing, resulting in more representative temperature readings. The American Society of Heating, Refrigerating and Air-Conditioning Engineers (ASHRAE) recommends this height for optimal performance. -
Proximity to Outside Walls:
Proximity to outside walls can affect the thermostat’s accuracy. Installing a thermostat too close to an exterior wall may result in fluctuations due to outdoor temperature changes. Researchers from the Lawrence Berkeley National Laboratory suggest placing thermostats at least 18 inches away from outside walls to maintain stable indoor temperatures. -
Avoidance of Direct Sunlight:
Avoidance of direct sunlight is crucial for maintaining an accurate temperature reading. Sunlight can artificially warm the thermostat, causing it to trigger heating or cooling systems at inappropriate times. The Building Science Corporation recommends positioning thermostats away from windows or areas with direct sun exposure to ensure truthful temperature readings. -
Consideration of Airflow Patterns:
Consideration of airflow patterns helps determine the most effective thermostat placement. A thermostat should be in a location that receives representative air from the entire space it controls. Research from the National Renewable Energy Laboratory indicates that ideal placements are near central air returns or in locations where airflow is consistent, preventing temperature discrepancies throughout the building.
How Does Sunlight Impact Thermostat Performance?
Sunlight impacts thermostat performance by affecting the temperature readings and overall efficiency. When sunlight directly hits a thermostat, it can cause the device to register a higher temperature than the actual air temperature. This misreading affects the thermostat’s ability to accurately control the heating or cooling systems.
The primary components involved include the thermostat, sunlight exposure, and the HVAC system. The thermostat senses the room temperature. Sunlight exposure alters the readings. The HVAC system responds based on these readings.
The logical sequence of steps is as follows:
- Sunlight reaches the thermostat. This can occur through windows or openings.
- The thermostat detects increased light and warmth. This causes it to misinterpret the room’s climate.
- The thermostat signals the HVAC system to adjust temperature settings. This leads to unnecessary heating or cooling.
- The HVAC system operates inefficiently. This can increase energy consumption and costs.
Each step connects in that sunlight exposure directly influences thermostat readings, which impairs the overall HVAC performance. To ensure accurate regulation, it is important to place thermostats away from direct sunlight or use shielding techniques to mitigate this impact.
Why Is the Distance from HVAC Equipment Crucial?
The distance from HVAC equipment is crucial for optimal performance and safety. Proper spacing affects airflow, efficiency, and maintenance access. Insufficient distance can lead to equipment overheating, decreased efficiency, and increased energy costs.
According to the American Society of Heating, Refrigerating and Air-Conditioning Engineers (ASHRAE), maintaining appropriate spatial relationships between HVAC components ensures effective airflow and minimizes obstructions.
Several key reasons explain the importance of distance from HVAC equipment. First, adequate spacing allows for proper airflow around coils and fans. Second, it provides necessary access for routine maintenance and repairs. Third, it reduces noise transmission into living spaces. Lastly, distance minimizes fire hazards associated with heat-generating components.
Technical terms, such as “airflow” and “obstructions,” refer to the movement of air in and around the HVAC system and any objects that impede that flow, respectively. Proper airflow is essential for transferring heat efficiently, while obstructions can lead to pressure imbalances and equipment stress.
The mechanisms involved include heat exchange and airflow dynamics. In heat exchange, air must pass over coils efficiently to either cool or heat a space. When distance is insufficient, air cannot circulate freely, leading to hot or cold spots in a building. Additionally, HVAC equipment needs specific clearance for proper ventilation, which prevents overheating and ensures safety.
Specific conditions that contribute to HVAC performance issues include inadequate installation space or obstructions from furniture and structures. For example, placing an air conditioning unit too close to walls can hinder air intake, causing the system to work harder and increasing energy consumption. Regular checks of surrounding areas for debris and proper installation are crucial for maintaining optimal HVAC function.
Where Should You Install Your Home Thermostat for Maximum Efficiency?
To achieve maximum efficiency with your home thermostat, install it in a central location of your home. Choose an area that is representative of the overall temperature in your residence. Avoid placing the thermostat near windows, doors, or outside walls. These locations can lead to inaccurate temperature readings due to drafts or direct sunlight. Additionally, do not install the thermostat near heat-producing appliances, such as lamps or televisions, as these can cause the thermostat to register higher temperatures than the actual room temperature. This placement allows the thermostat to more accurately control heating and cooling systems, leading to improved comfort and energy efficiency. Ensure the thermostat is mounted at eye level, about 5 feet from the floor, to capture an accurate average temperature from the area. With these guidelines, you can significantly enhance the performance of your home heating and cooling systems.
Is a Hallway or Living Room the Best Spot for Your Thermostat?
The best spot for your thermostat is typically a hallway. Hallways generally maintain a more consistent temperature than living rooms, which may have varying conditions due to activities, furniture placement, and sunlight exposure.
When comparing hallways to living rooms for thermostat placement, there are key factors to consider. Hallways are often centrally located in the home. They usually have less direct sunlight and fewer thermal influences from appliances or electronics. In contrast, living rooms may experience fluctuating temperatures due to window openings, heat-generating devices, and using HVAC systems. These fluctuations can cause the thermostat to misread the home’s actual temperature, leading to inefficient heating or cooling.
Placing a thermostat in a hallway can improve the overall efficiency of your home’s heating and cooling systems. According to the US Department of Energy, correct thermostat placement can enhance energy efficiency by up to 10%. A thermostat located in a stable environment helps maintain an accurate temperature, reducing energy consumption and leveling out indoor climate control.
However, hallway thermostats also have drawbacks. For example, hallways may not reflect the temperature experienced in more frequently used rooms like living rooms. If occupants spend most of their time in the living room, they may feel uncomfortable if the hallway thermostat is set based on its readings. Research from the American Society of Heating, Refrigerating and Air-Conditioning Engineers (ASHRAE) in 2019 indicated that improper thermostat placement could sometimes increase energy costs by up to 20%.
For optimal thermostat placement, consider the home layout and lifestyle. If your living room is used most often, relocate the thermostat there but ensure it is not directly exposed to drafts, sunlight, or appliances. For homes with multiple floors, consider adding additional sensors for a more accurate temperature reading throughout the house. Always ensure the thermostat is installed at an appropriate height, typically around 5 feet from the floor, for consistent readings.
What Height Should You Mount Your Thermostat For Optimal Functionality?
The optimal height for mounting a thermostat is between 50 to 60 inches from the floor.
Key considerations include:
1. Standard mounting height
2. Air circulation
3. Proximity to heat sources
4. Environment and room usage
5. Aesthetic preferences
When choosing the height for your thermostat, consider several factors that can influence functionality and effectiveness.
-
Standard Mounting Height: Mounting thermostats at a height of 50 to 60 inches is widely recommended. This range aligns with average eye level for adults, facilitating better temperature readings. According to the American Society of Heating, Refrigerating and Air-Conditioning Engineers (ASHRAE), this height helps minimize temperature discrepancies caused by floor drafts or ceiling heat.
-
Air Circulation: Thermostats must be placed where air can circulate freely around them. If a thermostat is located near walls or furniture, it may receive inaccurate temperature readings due to obstructions that block airflow. Poor placement can lead to inefficiency in heating and cooling systems, thus affecting energy consumption and comfort.
-
Proximity to Heat Sources: Avoid placing thermostats near heat-producing appliances, such as lamps, TVs, or vents. Heat from these sources can cause thermostats to read higher temperatures than the actual room temperature. This misread can lead to over-cooling or heating, which can inflate energy bills.
-
Environment and Room Usage: Consider how the room is used when mounting a thermostat. For instance, in rooms with large windows, direct sunlight may skew thermostat readings. Additionally, rooms that are seldom occupied might benefit from a secondary thermostat. Such considerations enable better energy management for rarely used spaces.
-
Aesthetic Preferences: Personal preferences also play a role in thermostat placement. Some homeowners may prioritize maintaining the flow of their interior design, placing thermostats in less conspicuous locations, while ensuring they remain effective. It is essential to balance aesthetics with functionality to maintain comfort within the space.
By evaluating these factors, homeowners can effectively enhance the functionality of their heating and cooling systems.
What Common Mistakes Should Be Avoided When Installing a Thermostat?
The common mistakes to avoid when installing a thermostat include improper placement, incorrect wiring, neglecting to turn off power, not following manufacturer instructions, and failing to calibrate after installation.
- Improper placement
- Incorrect wiring
- Neglecting to turn off power
- Not following manufacturer instructions
- Failing to calibrate after installation
To better understand these mistakes, let’s explore each one in detail.
-
Improper Placement: Improper placement of a thermostat can lead to inaccurate temperature readings. A thermostat installed near a heat source, like a fireplace or a sunny window, may get fooled into thinking the room is warmer than it is. This can disrupt the heating and cooling cycles of the HVAC system. The U.S. Department of Energy recommends placing thermostats on interior walls away from direct sunlight or drafts for the best performance.
-
Incorrect Wiring: Incorrect wiring is a frequent mistake that can compromise the functionality of the thermostat. Every thermostat has specific wire terminals that need to be connected appropriately. If wires are not attached correctly, the thermostat may not control the HVAC system as intended, leading to heating or cooling issues. According to a survey by the National Electrical Contractors Association, incorrect wiring is cited as a top cause of installation failure, affecting system efficiency and safety.
-
Neglecting to Turn Off Power: Neglecting to turn off the power during installation can lead to electrical shocks or damage to the thermostat. It’s essential to cut power at the circuit breaker to ensure safety. The Occupational Safety and Health Administration (OSHA) emphasizes the importance of electrical safety practices during installations to prevent accidents.
-
Not Following Manufacturer Instructions: Not following manufacturer instructions is a common oversight. Each thermostat model may have unique features and installation requirements. Ignoring these can lead to improper setup or operational failures. Consumer Reports states that many users face issues simply due to skipping steps in the installation guide, which can void warranties.
-
Failing to Calibrate After Installation: Failing to calibrate the thermostat after installation can result in inaccurate temperature control. Calibration ensures that the thermostat is set to provide the desired temperature accurately. According to Energy Star, calibration can improve energy efficiency by ensuring that the heating and cooling systems run only when necessary, thus saving energy costs.
How Can Proper Thermostat Placement Contribute to Energy Savings?
Proper thermostat placement can significantly contribute to energy savings by ensuring accurate temperature readings, enhancing system efficiency, and reducing energy waste.
Key points that illustrate this contribution include:
-
Accurate Temperature Readings: When a thermostat is placed in a location that reflects the average temperature of the space, it can measure the environment effectively. A study by the U.S. Department of Energy (DOE, 2020) indicates that improper placements could lead to misleading temperature readings, prompting the heating or cooling system to operate longer than necessary.
-
Enhanced System Efficiency: A well-placed thermostat can optimize the performance of heating, ventilation, and air conditioning (HVAC) systems. The Energy Information Administration (EIA, 2021) notes that systems operate more efficiently when thermostats are in open areas away from drafts and direct sunlight, which prevents unnecessary cycling of the HVAC system.
-
Reduced Energy Waste: Thermostat placement out of drafts and heat sources can help prevent overheating or overcooling. According to the American Council for an Energy-Efficient Economy (ACEEE, 2019), improper thermostat placement can increase energy consumption by up to 15%, meaning correct placement can lead to substantial savings on energy bills.
-
Zone Control Optimization: For homes with multiple zones, strategically placing thermostats allows for better climate control tailored to specific needs in each area. The Building Efficiency Initiative found that proper zone control could save homeowners as much as 25% in energy costs (BEI, 2018).
-
Increased Comfort: Proper placement of the thermostat can lead to a more consistent and comfortable environment in the home. A comfortable living space can reduce the tendency to adjust the thermostat frequently, which can lead to energy wastage.
Understanding and implementing proper thermostat placement can maximize energy savings while enhancing overall comfort and system performance in residential settings.
Related Post: