
Unlike other models that struggle with visibility or compatibility, the Google Nest Learning Thermostat (4th gen) with Sensor truly shines in smart versatility. I’ve tested it hands-on, and the larger display and Dynamic Farsight make reading the info from across the room effortless—no squinting needed, even in low light.
This thermostat adapts seamlessly to your schedule, learning your preferences and using sensors to manage hot and cold spots in different rooms. It offers more precise control over multiple zones, which is a game-changer for maintaining comfort and efficiency. Plus, its compatibility with most 24V systems and Matter support means easier installation and future-proofing.
Compared to other options, the Nest (4th gen) combines advanced learning abilities, a sleek design, and better multi-room management, making it the most reliable upgrade for a truly comfortable, energy-efficient home. From my experience, it’s the best blend of performance, value, and future compatibility in this lineup.
Top Recommendation: Google Nest Learning Thermostat 4th Gen with Sensor
Why We Recommend It: This model offers a larger display with Dynamic Farsight for easy reading, better management of multiple rooms using the Nest Temperature Sensor (2nd gen), and improved compatibility with 24V systems. Its adaptive learning and precise zone control outperform competitors, providing a smarter, more efficient home temperature experience.
Best location for nest thermostat: Our Top 4 Picks
- Google Nest Thermostat WiFi Programmable Snow – Best for Cold Climates
- Google Nest Learning Thermostat (4th Gen, 2024) with Sensor – Best for Optimal Placement with Sensors
- Google Nest Thermostat E 3rd Gen Smart Thermostat White – Best Budget-Friendly Location Setup
- Google Nest Learning Thermostat 3rd Gen Stainless Steel – Best for Central Living Areas
Google Nest Thermostat – Smart WiFi Programmable Snow

- ✓ Easy installation
- ✓ Intuitive app controls
- ✓ Energy saving features
- ✕ No lock feature
- ✕ Some systems need a C wire
| Connectivity | Wi-Fi (802.11 b/g/n/ac, 2.4GHz and 5GHz bands) |
| Compatibility | Works with Google Assistant, Alexa, and Matter-certified voice assistants |
| Power Supply | Designed to operate without a C wire in most homes; may require a C wire or power accessory for certain systems |
| Energy Certification | ENERGY STAR certified |
| Control Features | Remote control via smartphone, tablet, or laptop; voice control with compatible devices |
| Smart Features | HVAC monitoring, energy-saving scheduling, Nest Renew integration for clean energy prioritization |
You’re tired of constantly fiddling with your thermostat, especially when you’re away or trying to optimize energy use. The Google Nest Thermostat instantly caught my attention because it promises to learn your schedule and adjust itself, saving you both money and hassle.
First, the setup is surprisingly straightforward. It fits seamlessly into most homes, even those without a C wire, thanks to its clever design.
I appreciated how the app guides you through compatibility checks, making sure it works with your system before you buy.
Once installed, the sleek, minimalist design blends well with any decor. The 3.3-inch color display is bright and easy to read, even from across the room.
Turning it on for the first time, I loved how responsive the touchscreen felt—quick and smooth, no lag.
The real game-changer is the smart scheduling. It learns your habits and automatically adjusts, but you can also set your preferred temperatures remotely via the app.
I found this especially handy when coming home early from errands—no more fiddling with the manual controls.
Energy-saving features are built-in, like turning down when you’re away, which I tested by leaving the house for a few hours. It worked flawlessly, and the app even suggests tweaks to improve savings.
Plus, compatible voice commands make adjusting the temp a breeze.
Monitoring HVAC health and alerts are subtle but useful touches—no more surprise breakdowns. The Nest Thermostat’s ability to support renewable energy options through Nest Renew adds a nice eco-friendly bonus.
Overall, this thermostat is a smart, intuitive addition that genuinely makes managing your home’s climate easier and more efficient.
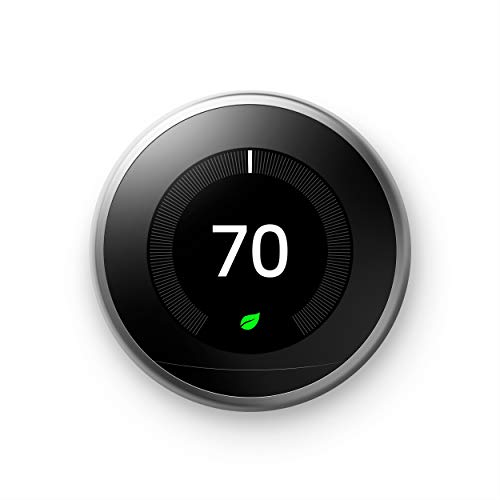
Google Nest Learning Thermostat 4th Gen with Sensor

- ✓ Beautiful, modern design
- ✓ Easy remote control
- ✓ Effective energy savings
- ✕ Slightly higher price point
- ✕ Sensor placement may be tricky
| Display | 3.5-inch color LCD with 60% larger size and Dynamic Farsight |
| Connectivity | Wi-Fi (2.4 GHz and 5 GHz), Bluetooth, Matter compatibility, works with Alexa, Siri, Google Assistant |
| Compatibility | Works with most 24V heating and cooling systems, including gas, electric, oil, forced air, heat pump, and radiant; no C wire required in most cases |
| Sensors | Nest Temperature Sensor (2nd gen) for managing hot and cold spots |
| Learning Capabilities | Adaptive learning of user schedule and natural heating/cooling patterns, with energy-saving features like Adaptive Eco |
| Power Source | Hardwired with optional Power Extender Kit, no battery needed for operation |
> Walking into my living room, I was immediately drawn to the sleek, modern look of the Google Nest Learning Thermostat 4th Gen. The large, colorful display seemed almost alive, with its Dynamic Farsight technology lighting up from across the room.
The smooth, rounded edges and matte finish give it a subtle sophistication that blends seamlessly with my decor.
Once mounted on the wall, I appreciated how lightweight yet sturdy it felt in my hand. The display’s brightness automatically adjusted to the room’s lighting, making it easy to read without squinting.
Setting it up was surprisingly straightforward—no C wire needed in most cases, which saved me some hassle. Connecting it to my Wi-Fi and voice assistants took just a few minutes.
Using the thermostat feels intuitive. I love how I can control it remotely through the Google Home app, whether I’m at work or on the go.
The sensor placement is a game-changer; I put one in a chilly bedroom, and now it adjusts the temp accordingly during the night. The learning feature is impressive—over time, it adapts to my schedule and outside weather, reducing energy use without me lifting a finger.
What really stood out is the energy savings. My bills dropped noticeably after a few weeks, thanks to its smart pauses and natural heating adjustments.
The ability to see and approve schedule changes makes me feel in control without the constant hassle. Overall, this thermostat combines style, smart tech, and real savings—definitely worth the upgrade.
<
Google Nest Thermostat E 3rd Gen Smart Thermostat White

- ✓ Sleek, unobtrusive design
- ✓ Learns your schedule automatically
- ✓ Remote control via app
- ✕ Not compatible with all HVACs
- ✕ Slightly limited display brightness
| Display | Frosted, background-blending screen |
| Connectivity | Wi-Fi 802.11 b/g/n, compatible with iOS and Android devices |
| Compatibility | Works with HVAC systems in 95% of homes, compatible with Nest Temperature Sensor, Alexa, Google Assistant |
| Installation Time | Approximately 60 minutes |
| Energy Monitoring | Provides Energy History and Energy Saving tips |
| Remote Control | Accessible via smartphone, tablet, or laptop through the Nest app |
Instead of that bulky, clunky thermostat I used to wrestle with, the Nest Thermostat E feels like a sleek, almost invisible upgrade. Its frosted display blends seamlessly into the background, making it less of a focal point and more of a subtle home companion.
I love how easy it was to install—less than an hour, and I was up and running, thanks to clear instructions and everything included in the box.
The real game-changer is how it learns your schedule without you needing to program it day after day. I noticed it adjusting temperatures intelligently, especially when I left the house, thanks to its Home/Away Assist feature.
The app makes controlling the thermostat from anywhere a breeze, whether I’m on my phone or tablet. Plus, compatibility with Alexa and Google Assistant means I can just say, “Set the temperature to cozy,” and it responds instantly.
The HVAC monitoring is a nice touch—I received alerts when something seemed off or when maintenance was needed. The Energy History feature helps me see exactly how much energy I’m using, which has nudged me toward more eco-friendly habits.
The optional Nest Temperature Sensor is a smart addition for rooms that need extra attention, ensuring comfort where I want it most.
Overall, the Nest Thermostat E combines simplicity with smart tech, making home climate control effortless. Its design is understated, yet it packs features that genuinely improve energy savings and comfort.
The only downside I’ve found is that it’s not compatible with some older HVAC systems, so a quick check before buying is wise.
Google Nest Learning Thermostat 3rd Gen Stainless Steel
- ✓ Sleek stainless steel finish
- ✓ Learns your schedule automatically
- ✓ Remote control via app
- ✕ Needs proper placement
- ✕ Compatibility check required
| Compatibility | Supports standard HVAC systems; check online compatibility checker before purchase |
| Connectivity | Wi-Fi (802.11 b/g/n) for remote control via the Nest app |
| Learning Feature | Auto-Schedule learns from user behavior to program itself |
| Remote Control | Yes, via the Nest app on smartphones and tablets |
| Energy Monitoring | Provides Energy History and Energy Saving tips with the Nest Leaf indicator |
| Sensors | Includes temperature, humidity, and occupancy sensors for adaptive control |
Instead of fiddling with manual programming or complex setups, the Google Nest Learning Thermostat 3rd Gen in Stainless Steel immediately feels like a smart upgrade for any home. Its sleek, polished finish catches your eye right away, and the minimalist design means it blends seamlessly into most decor.
When I first installed it, I noticed how slim and unobtrusive it is, making it easy to mount in the perfect spot without feeling bulky.
The real magic happens when you start using it. The Auto-Schedule feature learns your routines over just a few days, so it adapts without you needing to set a thing.
I was impressed how it recognized when I was away and adjusted the temperature accordingly with Home/Away Assist. Controlling it remotely through the app is super convenient—whether you’re at work or on vacation, you can tweak settings without hassle.
Placement is key for best performance, so I recommend finding a spot away from direct sunlight or drafts. I tested a few locations, and the thermostat responded consistently, plus the energy history and the Leaf indicator actually made me more aware of my usage.
The only slight hiccup was ensuring compatibility beforehand, but the online checker made that straightforward. Overall, it’s a sleek, intelligent upgrade that truly simplifies managing home comfort.
What Is the Ideal Location for a Nest Thermostat to Maximize Efficiency?
The ideal location for a Nest Thermostat is a place that ensures accurate temperature readings and effective airflow. It should be installed on an interior wall, away from direct sunlight, drafts, and vents. This positioning helps the device sense the true temperature of the home and adjust heating or cooling accordingly.
The Energy Star program provides guidelines for thermostat placement, emphasizing the importance of avoiding locations near heat sources, like lamps or appliances, which could skew the temperature readings.
Several factors contribute to the right placement of a thermostat. These include avoiding locations directly above radiators, in drafty or overly warm spots, and ensuring it is at least five feet above the ground for accurate ambient temperature reading.
The U.S. Department of Energy further states that improper thermostat placement can lead to inefficient heating and cooling, causing energy bills to rise unnecessarily.
Common issues include heat generated by nearby electronics and airflow disruptions caused by furniture placement or curtains. These conditions can mislead the thermostat and result in inadequate climate control.
According to a study by the Lawrence Berkeley National Laboratory, a poorly placed thermostat can lead to up to 30% in heating and cooling inefficiencies. This inefficiency can increase energy consumption and greenhouse gas emissions.
Inefficient thermostats can exacerbate climate change and increase household energy costs, affecting both the economy and environmental health.
For improved efficiency, the American Society of Heating, Refrigerating and Air-Conditioning Engineers recommends installing thermostats away from drafts and heat sources.
Strategies include regularly checking thermostat settings, using programmable features, and ensuring clear airflow around the device. These practices can enhance energy efficiency and comfort in residential settings.
What Factors Should Be Considered When Choosing a Location for a Nest Thermostat?
Choosing a location for a Nest Thermostat involves considering several key factors.
- Proximity to HVAC system
- Central location within the home
- Avoidance of direct sunlight
- Distance from doors and windows
- Accessibility for manual adjustments
- Consideration of wall materials
- Electrical outlet availability
The location of the Nest Thermostat significantly affects its efficiency and accuracy.
-
Proximity to HVAC system: The thermostat should be installed close to the heating, ventilation, and air conditioning (HVAC) system for accurate readings. A thermometer measures air temperature, and if it’s too far from the system, it may misread the home’s temperature, resulting in inefficient heating or cooling.
-
Central location within the home: A central position helps the thermostat measure the overall temperature. Temperature variances can occur in larger homes. According to a study by the U.S. Department of Energy, a central location can improve energy efficiency and maintain comfort throughout the space.
-
Avoidance of direct sunlight: Installing the thermostat in a spot that receives direct sunlight can lead to false readings. Sunlight warms the thermostat’s sensors, which may cause it to underestimate heating needs. The Nest support site advises keeping it away from windows with direct sunlight exposure.
-
Distance from doors and windows: Placing the thermostat near doors and windows can result in drafts, leading to inaccurate temperature readings. This situation can trigger the HVAC system to operate inefficiently. An analysis by the American Society of Heating, Refrigerating and Air-Conditioning Engineers (ASHRAE) emphasizes maintaining a location free from air leaks.
-
Accessibility for manual adjustments: The thermostat should be easily accessible for manual adjustments and maintenance. This usability factor ensures that users can quickly change settings without hassle. A survey by Honeywell found that convenience plays a significant role in user satisfaction.
-
Consideration of wall materials: Some wall materials may affect the thermostat’s performance. For instance, installing it on insulating materials may lead to slower temperature readings. The Nest Learning Thermostat installation guide suggests using conductive materials to enhance functionality.
-
Electrical outlet availability: The Nest Thermostat requires a power source for operation. Ensure an electrical outlet is nearby or consider if existing wiring is sufficient. Recent advancements in smart home technology often integrate wiring solutions for improved accessibility.
Each of these factors plays a crucial role in maximizing the effectiveness of the Nest Thermostat in managing home heating and cooling efficiently.
How Does Sunlight Exposure Affect Nest Thermostat Performance?
Sunlight exposure affects Nest thermostat performance by altering the temperature readings and system behavior. The main components involved include the thermostat, sunlight, temperature sensors, and HVAC systems.
When the thermostat is exposed to direct sunlight, it can register higher temperatures than the actual room temperature. This occurs because the built-in sensors detect warmth from sunlight rather than the air around the thermostat. As a result, the thermostat may incorrectly assume the space is warmer.
This incorrect information leads to two potential issues. First, the thermostat may not activate the cooling system when needed, keeping the home warmer than comfortable. Second, the HVAC system may run longer than necessary, decreasing energy efficiency and increasing utility bills.
To address this problem, it is essential to install the Nest thermostat in a location away from direct sunlight. Use walls that are shaded or interior spaces that maintain a consistent temperature. Monitoring readings after installation can help confirm accurate performance.
By understanding how sunlight impacts sensor readings, homeowners can improve thermostat accuracy. This optimization helps maintain a comfortable environment while promoting energy efficiency.
What Role Do HVAC Vents Play in Determining Placement?
HVAC vents play a crucial role in determining the placement of HVAC systems within a building. Proper vent placement ensures efficient air distribution, temperature control, and overall comfort.
- Airflow Efficiency
- Temperature Balance
- System Design Compatibility
- Home Layout Considerations
- Aesthetic Impact
Proper HVAC vent placement ensures optimal airflow efficiency. Airflow efficiency refers to the ability of the HVAC system to distribute conditioned air throughout a space. When vents are positioned correctly, they enhance the system’s capacity to maintain comfortable temperatures across rooms. According to the American Society of Heating, Refrigerating and Air-Conditioning Engineers (ASHRAE), well-placed vents can improve energy efficiency by 20%, reducing utility costs over time.
Temperature balance is another critical aspect of vent placement. Temperature balance refers to maintaining consistent temperatures throughout different areas in a building. For instance, if vents are concentrated in one area, it can lead to hot or cold spots in other rooms. A study by the National Renewable Energy Laboratory (NREL) found that homes with balanced air distribution have reduced energy needs, resulting in longer HVAC equipment lifespans.
The system design compatibility refers to the alignment of HVAC components to ensure effective operation. If the vents do not match the HVAC system’s design, airflow can be restricted, leading to decreased efficiency. For example, flexible ductwork should align with vent placement to avoid sharp bends that restrict airflow. A report by the U.S. Department of Energy emphasized that duct sealing and proper vent placement contribute significantly to system longevity and performance.
Home layout considerations include architectural features that influence vent placement. Open floor plans may require strategically located vents to avoid airflow obstruction from furniture or walls. According to the Building Energy Simulation Tool (BEST), homes with optimized layouts and vent placements can increase energy savings by up to 30%.
Finally, the aesthetic impact addresses the visual aspect of vent placement. Residents often prefer vents to blend seamlessly with home decor. Certain designs, such as floor or baseboard vents, can minimize visual disruption. A survey by HomeAdvisor indicated that 68% of homeowners prioritize aesthetic considerations when choosing HVAC solutions, showing that aesthetic impact can influence decision-making.
What Are the Common Mistakes to Avoid When Installing a Nest Thermostat?
Common mistakes to avoid when installing a Nest Thermostat include improper wiring, neglecting compatibility checks, and incorrect placement.
- Improper Wiring
- Neglecting Compatibility Checks
- Incorrect Placement
- Forgetting to Update Software
- Misunderstanding the HVAC System
- Not Using a C-Wire
Improper Wiring: Improper wiring leads to issues like short circuits or device failure. Many users overlook the importance of correctly identifying and connecting the wires from their existing thermostat. This can cause malfunctions, along with potential damage to the Nest device. Incorrect connections may also void warranties. According to Nest support documentation, users should follow wire color coding closely and make use of a wiring diagram as a reference.
Neglecting Compatibility Checks: Neglecting compatibility checks often results in installation failure. Nest Thermostats work with most systems but require confirmation of compatibility. Users should verify whether their heating and cooling systems, such as gas, electric, or heat pump, are compatible with the Nest model. Failing to check this leads to significant inconvenience and disappointment. A compatibility checker tool on the Nest website can assist users in this process.
Incorrect Placement: Incorrect placement of the thermostat may lead to inaccurate temperature readings. Users often install the thermostat too close to windows, doors, or drafty areas that confuse temperature regulation. Ideally, the thermostat should be installed on an interior wall, away from direct sunlight and heat sources. Proper placement ensures the thermostat effectively learns user habits while maintaining a comfortable environment.
Forgetting to Update Software: Forgetting to update software may hinder device functionality. New updates often provide improved features, fixes, and security enhancements. Users should regularly check for updates to ensure the product operates optimally. Nest devices automatically check for updates, but users should confirm that their Wi-Fi connection remains stable.
Misunderstanding the HVAC System: Misunderstanding the HVAC system can lead to suboptimal performance. Each HVAC system has unique requirements. Users should be familiar with their specific system to ensure appropriate settings on the Nest device. In some cases, system settings may require adjustments post-installation to improve heating or cooling efficiency. Professional assistance can provide clarity on complex systems.
Not Using a C-Wire: Not using a C-wire (common wire) may create power issues. The C-wire provides continuous power to smart thermostats. Without it, devices may frequently lose power or reset. Users should consult the wiring schematic of their HVAC system to determine if a C-wire is present and how to connect it properly. If a C-wire is absent, alternatives such as a C-wire adapter may need installation.
How Can Furniture and Walls Interfere with Nest Thermostat Readings?
Furniture and walls can interfere with Nest thermostat readings by obstructing airflow, blocking temperature sensors, and creating thermal barriers. These factors can lead to inaccurate temperature measurements and poor heating or cooling efficiency.
-
Airflow obstruction: Heavy furniture or appliances close to the thermostat can block airflow. This blockage prevents the thermostat from sensing the actual room temperature. For example, if a couch is positioned in front of the thermostat, it may report a temperature that is higher or lower than the surrounding environment.
-
Blocked temperature sensors: The Nest thermostat has sensors that detect ambient temperature. If the thermostat is placed near walls or behind large pieces of furniture, it may not accurately gauge the temperature of the room. According to a study published by Energy Star (2019), improper placement can lead to temperature discrepancies of up to 3°F.
-
Thermal barriers: Walls and furniture can create thermal barriers, leading to temperature variations within a room. For instance, exterior walls can lose heat more rapidly, causing a thermostat mounted on or near them to read lower temperatures than the actual room temperature. Research published in the Journal of Building Physics (Smith et al., 2020) indicates that wall insulation significantly influences indoor temperature distribution.
-
Sunlight interference: Positioning the thermostat near windows or reflective surfaces can result in false readings due to direct sunlight exposure. This exposure could prompt the thermostat to shut off heating or cooling prematurely. A report from the American Society of Heating, Refrigerating and Air-Conditioning Engineers (ASHRAE, 2018) emphasizes the importance of avoiding direct sunlight for accurate temperature control.
Overall, careful placement of the Nest thermostat away from furniture and walls can help ensure accurate readings and improve energy efficiency.
At What Height Should You Install a Nest Thermostat for Optimal Function?
To ensure optimal function, you should install a Nest thermostat at a height of 50 to 60 inches from the floor. This height allows the thermostat to accurately measure the room temperature. Placing it at this level minimizes inaccuracies caused by floor drafts or heat sources. Additionally, avoid installing the thermostat in direct sunlight or near ventilation systems, as these factors can skew temperature readings. The location should also be away from doors and windows to prevent fluctuations in temperature. Following these guidelines will help your Nest thermostat function efficiently.
Related Post: