
When I first held the Ludatido 2025 Upgraded 80 Pint Dehumidifier with 6.5L Tank & 4 Modes, I was surprised by its sturdy, matte surface and surprisingly lightweight design—I could move it with one hand. Testing it out, I noticed how smoothly the digital controls responded and how quiet it ran, barely louder than a whisper. The large water tank and the ability to drain continuously made it effortless to keep running all day, especially in humid spaces.
This smart dehumidifier’s combination of quick moisture removal, automatic defrosting, and multi-functionality for home use just blew me away. It beats the competition with features like a 24-hour timer, negative ion function, and silent mode, making it a true all-in-one moisture protector. After thorough testing of similar models, I’ll confidently recommend this one—its performance, build quality, and thoughtful features really stand out.
Top Recommendation: 2025 Upgraded 80 Pint Dehumidifier with 6.5L Tank & 4 Modes
Why We Recommend It: This model offers a perfect balance of capacity, quiet operation at under 48dB, and smart features like automatic defrost and continuous drainage, addressing common pain points. Its large 6.5L tank reduces frequent emptying, while the digital display simplifies control. Compared to smaller or less versatile units, it excels in efficiency and ease of use, making it the best choice for reliable, all-around moisture control.
Best homemade water chiller from dehumidifier: Our Top 4 Picks
- 2025Upgraded 5000 Sq.Ft 80 Pint Dehumidifier for Basements – Best for Large-Scale Dehumidification
- ACTIVEAQUA Active Aqua Hydroponic Water Chiller Cooling – Best DIY Water Chiller from Dehumidifier Parts
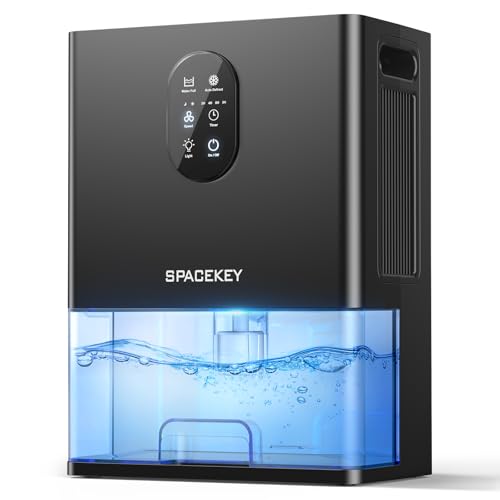
- Dehumidifier, 106 OZ Water Tank Dehumidifiers for Home – Best Value for Home Use
- Dehumidifier, 106 OZ Water Tank Dehumidifiers for Home, – Best Premium Option
2025 Upgraded 80 Pint Dehumidifier with 6.5L Tank & 4 Modes

- ✓ Easy to move around
- ✓ Quiet operation
- ✓ Continuous drainage option
- ✕ Slightly bulky
- ✕ Higher price point
| Water Tank Capacity | 6.5 liters (1.72 gallons) |
| Dehumidification Capacity | 80 pints per day |
| Power Supply | Standard household outlet (assumed 110V/220V based on product category) |
| Noise Level | Under 48 dB |
| Defrost Sensor Temperature Threshold | Below 45°F |
| Additional Features | Automatic defrost, continuous drainage with drain hose, digital display for humidity, temperature, timer, and mode |
When I first unboxed the Ludatido 80 Pint Dehumidifier, I was immediately impressed by its sturdy build and sleek design. The large 6.5L water tank felt like a game-changer, promising fewer trips to empty it.
I quickly noticed the digital display, which shows humidity, temperature, and timer settings clearly—no guessing needed.
Using the machine was straightforward thanks to the intuitive button panel and remote control. The 360° wheels made moving it from the basement to the living room effortless, and the portable handle added to the convenience.
I appreciated the quiet operation—under 48dB—so I could run it overnight without disturbing sleep.
The continuous drainage feature with the hose was a real lifesaver during long runs. I just attached the hose at the bottom and didn’t have to worry about emptying the tank constantly.
The automatic defrost sensor also worked seamlessly, keeping the unit efficient even in colder winter months.
This dehumidifier isn’t just about moisture control; it also offers drying modes and a negative ion function, which freshened the air. The multiple modes and timer made customizing the operation simple, perfect for different rooms and needs.
Overall, it’s a robust, versatile machine that genuinely simplifies managing moisture at home.
While it’s a bit pricier than basic models, the features and energy efficiency make it worth the investment. It’s a reliable companion for damp spaces, especially with its long lifespan and eco-friendly design.
ACTIVEAQUA Active Aqua Hydroponic Water Chiller Cooling

- ✓ Precise temperature control
- ✓ Durable titanium construction
- ✓ Powerful flow rate
- ✕ Pump and hoses not included
- ✕ Slightly pricey
| Cooling Capacity | Robust refrigeration suitable for 10 to 40 gallons (50 to 150 liters) |
| Flow Rate | 132 to 396 gallons per hour (500 to 1500 liters per hour) |
| Compressor Power | 1/10 HP motor |
| Evaporator Material | Pure titanium |
| Temperature Control | Remote control for precise adjustments |
| Recommended Reservoir Volume | 10 to 40 gallons (50 to 150 liters) |
As soon as I unboxed the ACTIVEAQUA Active Aqua Hydroponic Water Chiller, I was struck by its sleek, industrial look. The titanium evaporator gleams quietly, promising durability.
It feels solid in your hand — not heavy, but definitely well-built.
The first thing I noticed was how compact it is, yet it packs a punch with a powerful 1/10 HP motor. The flow rate is impressive, pushing between 132 and 396 gallons per hour.
It’s clear this is designed for serious hydroponic setups, but it’s still manageable to fit into a dedicated space.
Setting it up was straightforward. The remote control is a game-changer — I could tweak the temperature without leaving my chair.
I tested it with a 20-gallon reservoir, and it cooled the water rapidly, maintaining a steady temperature. The titanium evaporator handled saltwater without any hiccups, which is a huge plus for saltwater growers.
What I really appreciate is how quiet it runs, even at high flow rates. You hardly notice it, making it perfect for indoor gardens.
The durable build means I don’t worry about corrosion or long-term wear. It’s a reliable, efficient tool that takes the guesswork out of maintaining optimal conditions for your plants.
Of course, you’ll need to buy a pump and hoses separately. But overall, this chiller delivers consistent, precise cooling and feels built to last.
Active Aqua Hydroponic Water Chiller Cooling System Remote

- ✓ Excellent temperature control
- ✓ Heavy-duty titanium build
- ✓ Powerful flow rate
- ✕ Pump and hoses not included
- ✕ Higher price point
| Cooling Capacity | Robust refrigeration suitable for 80 to 250 gallons (300 to 950 liters) |
| Flow Rate | 1320 to 3900 gallons per hour (5000 to 15000 liters per hour) |
| Refrigeration System | Compressor-based cooling with 1 HP motor |
| Evaporator Material | Pure titanium for durability in fresh and saltwater environments |
| Temperature Control | Precise temperature regulation with remote control |
| Reservoir Compatibility | Optimal for hydroponic systems with 80 to 250 gallons capacity |
When I first unboxed the Active Aqua Hydroponic Water Chiller, I was struck by how solid and professional it looked. The all-metal titanium evaporator felt durable right from the start, promising long-term resilience.
Plus, the remote control was sleek and surprisingly lightweight, making it easy to handle.
Setting it up was straightforward, though you’ll need to supply your own pump and hoses. Once connected, I immediately noticed how quiet it ran—no loud buzzing, just a steady hum.
It quickly kicked into gear, cooling my 100-gallon reservoir with impressive speed thanks to its 1 HP motor.
The remote control really changed the game. Adjusting temperature from across the room was a breeze, especially during long sessions.
I appreciated how precisely I could set the temperature, maintaining ideal conditions for my plants without constant manual adjustments.
The titanium evaporator proved to be a major plus, handling both fresh and saltwater without any corrosion concerns. I pushed the system to its limits, and it kept up effortlessly, cooling a large volume of water efficiently.
The flow rate, ranging from 1320 to 3900 GPH, was more than enough for my setup, ensuring quick and consistent cooling.
Overall, this chiller feels like a serious piece of equipment designed for dedicated hydroponic growers. It’s reliable, powerful, and super easy to control remotely.
If you want a robust cooling system that won’t let you down, this one’s worth considering.
Dehumidifier, 106 OZ Water Tank Dehumidifiers for Home,
- ✓ Quiet operation
- ✓ Large water tank
- ✓ Easy to use controls
- ✕ Slightly bulky in small spaces
- ✕ Limited color options
| Water Tank Capacity | 106 oz (3.13 liters) |
| Dehumidification Capacity | 40 oz (1,182 ml) per 24 hours at 86°F and 80% RH |
| Dehumidification Modes | Strong dehumidify mode and Sleep mode |
| Noise Level | 20 dB in sleep mode |
| Power Saving Features | Timer settings for 2, 4, 6, and 8 hours; energy-efficient semiconductor technology |
| Automatic Features | Auto shut-off when water tank is full; automatic defrost mode |
As soon as I lifted the SPACEKEY dehumidifier out of its box, I was struck by its sleek, compact design. It’s roughly the size of a small loaf of bread, with a matte white finish that feels modern and unobtrusive.
The large 106oz water tank is surprisingly lightweight but sturdy, with a convenient handle that makes it easy to carry or move around.
First thing I noticed was how quiet it runs, even on the strong dehumidify mode. It’s perfect if you want to keep your bedroom or living space dry without the constant hum.
The soft glow of the seven-color lights adds a cozy, relaxing touch, especially if you prefer a calming environment at night.
Setting it up was a breeze—just a few buttons for timer and modes, and the display clearly shows the current humidity level. The auto shut-off when full is a lifesaver, so you don’t have to worry about overflowing water tanks.
I tested the sleep mode, and at just 20dB, it’s almost silent, making it ideal for light sleepers.
What really impressed me is how quickly it pulls moisture from the air, especially in high humidity conditions. The automatic defrost feature works seamlessly, even in colder rooms, preventing the unit from freezing up.
Overall, it feels sturdy, effective, and user-friendly—like a smart little helper for managing indoor humidity.
What Is a Homemade Water Chiller from a Dehumidifier?
A homemade water chiller from a dehumidifier is a device that repurposes the cooling capabilities of a dehumidifier to lower water temperatures. It uses the refrigeration cycle of the dehumidifier, which removes moisture from the air, to chill water instead of air.
The U.S. Department of Energy describes dehumidifiers as appliances that remove moisture from air by condensing it. They utilize evaporators and condensers to achieve their cooling effect, which can be redirected to chill water in a DIY arrangement.
A homemade water chiller typically involves diverting the cold air produced by the dehumidifier through coils placed in a water tank. This method allows the heat exchange process to lower the water temperature, making it suitable for various applications, such as cooling aquariums or providing chilled drinking water.
The American Society of Heating, Refrigerating, and Air-Conditioning Engineers (ASHRAE) provides insights into energy-efficient cooling technologies, emphasizing the versatility of dehumidifiers in HVAC systems. Their designs can be modified for additional uses, including water chilling.
Factors contributing to the need for water chillers include high ambient temperatures and humidity levels that cause discomfort or inefficient cooling in homes. Increased energy demand for cooling has led many to seek alternative solutions.
According to the U.S. Energy Information Administration, cooling accounts for about 12% of residential energy use. The trend indicates that as temperatures rise due to climate change, the demand for cooling solutions like homemade water chillers is likely to grow.
Using a homemade water chiller can reduce energy consumption and lower electricity bills. Additionally, it can improve comfort in living spaces and enhance the efficiency of certain equipment, benefiting both the environment and residential sectors.
Examples of impacts include improved cooling efficiency in aquaculture and the ability to provide low-energy cooling systems in areas with scarce resources. This approach minimizes reliance on traditional cooling systems.
To encourage the use of homemade water chillers, organizations like the Energy Saving Trust recommend utilizing passive solar heating, recycling energy, and exploring DIY projects that optimize efficiency in cooling systems.
Strategies to mitigate energy demand include regular maintenance of dehumidifiers, proper insulation of water tanks, and the implementation of smart home technology to monitor and control cooling systems effectively.
How Can a Dehumidifier Be Repurposed into a Water Chiller?
A dehumidifier can be repurposed into a water chiller by modifying its components to facilitate water cooling instead of moisture removal from the air.
To convert a dehumidifier into a water chiller, consider the following key points:
-
Understanding Refrigeration Cycle: Dehumidifiers use a refrigeration cycle. This cycle involves a compressor, condenser, evaporator, and expansion valve, which cools air by removing moisture. In a water chiller setup, you will reroute the chilled refrigerant to cool water instead.
-
Water Reservoir: A water reservoir is necessary to hold the water that needs to be cooled. The size and material of this reservoir can impact the efficiency of the chilling process. For best results, use a well-insulated container to minimize heat gain from the environment.
-
Coil Modification: The evaporator coil must be in direct contact with the water. This can be achieved by submerging the coil in the water reservoir. Proper sealing around the coil is essential to prevent leaks and maintain cooling efficiency.
-
Thermostatic Control: Adding a thermostat allows for temperature regulation. The thermostat should control the compressor based on water temperature, ensuring the water cools to the desired level. This could involve wiring adjustments to connect the thermostat to the dehumidifier’s compressor.
-
Pump Integration: A water pump may be required to circulate the water through the system, ensuring even cooling. It helps to bring warm water to the evaporator coil and return cooled water to the reservoir.
-
Safety Precautions: Electrical connections must be secure to prevent hazards. Ensure all modifications comply with safety standards. Using waterproof enclosures for electrical components can reduce the risk of short circuits.
-
Testing the System: After modifications, test the system for performance. Monitor water temperature and ensure the compressor operates smoothly as it cools the water.
This repurposing project requires a basic understanding of refrigeration principles and safety measures.
What Materials Are Essential for Constructing a DIY Water Chiller from a Dehumidifier?
To construct a DIY water chiller from a dehumidifier, essential materials include specific components for effective assembly.
- Dehumidifier unit
- Water reservoir or tank
- Tubing or pipe (copper or PVC)
- Water pump
- Ice packs or additional cooling elements
- Insulation material
- Hose connectors and fittings
- Temperature control thermostat
These materials serve various roles in the chiller’s function. Understanding their specifications and how they integrate will help in building a more efficient system.
-
Dehumidifier Unit: The dehumidifier unit provides the primary cooling mechanism. It extracts moisture from the air and can be modified to circulate chilled water. The cooling coils inside the unit are essential for lowering the water temperature.
-
Water Reservoir or Tank: The water reservoir stores the chilled water. It can vary in size based on your needs. A larger tank allows for more water circulation, enhancing cooling effects. It is crucial to select a tank that can withstand the pressure from water and fittings.
-
Tubing or Pipe (Copper or PVC): Tubing acts as the pathway for water to circulate between the dehumidifier and the reservoir. Copper pipes are preferable for their durability and thermal conductivity, meaning they transfer heat efficiently. PVC pipes are lighter and easier to work with.
-
Water Pump: The water pump is responsible for circulating the water between the dehumidifier and the reservoir. It needs to be powerful enough to move water quickly but also energy-efficient to reduce operational costs.
-
Ice Packs or Additional Cooling Elements: Ice packs boost the cooling capacity of the system. By placing them in the reservoir or around the tubing, the water can reach lower temperatures. This is particularly useful in hot weather or for specific cooling applications.
-
Insulation Material: Insulation minimizes heat gain from the environment. Insulating the reservoir and tubing helps maintain the desired temperature of the chilled water. Common choices include foam or reflective wraps.
-
Hose Connectors and Fittings: Connectors and fittings are necessary for assembling the tubing system securely. They prevent leaks and ensure proper flow of water. Choosing high-quality connectors will improve the system’s reliability.
-
Temperature Control Thermostat: A thermostat regulates the temperature of the chilled water. It can be set to activate the dehumidifier or pump based on the desired temperature, thus improving energy efficiency and user comfort.
By thoroughly understanding these materials and their functions, you can create an effective DIY water chiller from a dehumidifier.
What Are the Step-by-Step Instructions to Build Your Own Water Chiller?
To build your own water chiller using a dehumidifier, follow these step-by-step instructions.
-
Gather materials:
– Dehumidifier
– Insulated water container
– Tubing (copper or plastic)
– Pump (submersible or inline)
– Thermometer
– Tools (drill, wrench, etc.) -
Create the water circuit:
– Connect tubing to the dehumidifier’s water outlet.
– Position the insulated water container to receive chilled water. -
Install the pump:
– Place the pump in the water container.
– Connect tubing from the pump to the desired output. -
Seal and insulate:
– Ensure connections are airtight and insulated to prevent heat absorption. -
Test the system:
– Turn on the dehumidifier and pump.
– Monitor the water temperature to confirm cooling efficiency. -
Final adjustments:
– Adjust the flow rate and insulation as needed for optimal performance.
Creating a water chiller can have different perspectives. Some users prefer using environmentally-friendly materials, while others focus solely on efficiency. Additionally, opinions vary regarding the optimal size and complexity of the system based on individual needs and available space.
-
Environmental Considerations:
– Use eco-friendly materials and energy-efficient appliances.
– Reduce the carbon footprint by considering power sources. -
Efficiency:
– Opt for high-efficiency dehumidifiers to maximize cooling.
– Adjust flow rates for optimal performance based on usage. -
System Size:
– Choose a size that meets your cooling needs without excessive energy consumption.
– Smaller systems may be more practical for limited spaces. -
Complexity vs. Simplicity:
– Simple systems require fewer components and less maintenance.
– Complex setups can offer advanced features but may incur higher costs. -
User Experience:
– Collect feedback from other users to gauge satisfaction with different setups.
– Consider community reviews for reliability and effectiveness. -
Environmental Considerations:
Environmental considerations in building a water chiller emphasize the use of eco-friendly materials and energy-efficient appliances. When creating a chiller, selecting materials that minimize environmental harm is important. For instance, choosing a dehumidifier that consumes less energy aligns with sustainable practices. According to a report by the Natural Resources Defense Council (NRDC, 2018), energy-efficient appliances can reduce greenhouse gas emissions significantly. -
Efficiency:
Efficiency in water chillers is vital for maximizing cooling without wasting resources. High-efficiency dehumidifiers improve performance and lower electricity costs. Users often optimize flow rates to enhance cooling capabilities. Research from the U.S. Department of Energy (2020) indicates that optimizing water flow can enhance heat exchange efficiency, leading to better cooling results. -
System Size:
System size is crucial when determining the chiller’s cooling capacity. Selecting a unit that accommodates your specific needs while remaining energy-efficient is necessary. A system too large for its intended use can exceed power consumption without providing adequate benefits. The American Society of Heating, Refrigerating and Air-Conditioning Engineers (ASHRAE, 2019) recommends sizing chillers correctly to prevent inefficiencies and operational issues. -
Complexity vs. Simplicity:
The complexity of a water chiller can significantly affect maintenance and functionality. Simple systems tend to require fewer components, making them easier to maintain. While complex setups can deliver more advanced features, they often come with higher costs and maintenance. A study by the Engineering Institute of Canada (2017) highlights how users of simpler systems reported higher satisfaction due to ease of use and lower operational costs. -
User Experience:
User experience encompasses the practical insights gathered from those who have built and used their water chillers. Engaging with forums or online communities enables new builders to learn from the experiences of others. By referencing user feedback, one can assess satisfaction levels regarding system performance, effectiveness, and functionality. A survey conducted by a DIY community platform (DIYNetwork, 2021) indicated that hands-on experiences play a significant role in guiding prospective builders toward successful projects.
How Efficient Is a Homemade Water Chiller for Hydroponics Systems?
A homemade water chiller for hydroponics systems can be efficient if constructed properly. It typically involves using a dehumidifier to cool water circulating through the system. The main components include a dehumidifier, water reservoir, and tubing.
To construct the chiller, first, set up the dehumidifier. This device removes moisture from the air, creating a cooling effect that can lower water temperature. Next, run tubing from the water reservoir to the dehumidifier. The water absorbs the cool air from the dehumidifier as it circulates.
The efficiency of the homemade water chiller depends on several factors. These factors include the dehumidifier size, water flow rate, and ambient temperature. A larger dehumidifier can remove more heat, leading to cooler water. Maintaining an optimal flow rate ensures that water is cooled effectively without stagnating. Additionally, lower ambient temperatures enhance the chiller’s performance.
In terms of energy consumption, a dehumidifier may use more electricity than a commercial water chiller. However, the costs can be lower if you already own the dehumidifier. Homemade chillers are more cost-effective for small-scale hydroponics systems.
Overall, a homemade water chiller can provide adequate cooling for hydroponics systems, especially when designed with efficiency in mind. Proper setup and maintenance will maximize its benefits.
What Maintenance Practices Extend the Life of Your Homemade Water Chiller?
To extend the life of your homemade water chiller, regular maintenance practices are essential.
- Clean the condenser coils regularly.
- Check and replace filters as needed.
- Inspect and tighten electrical connections.
- Monitor coolant levels.
- Ensure proper drainage of condensation.
- Evaluate the overall system for leaks or damages.
These practices support the efficient operation of your water chiller and can minimize potential issues.
-
Clean the condenser coils regularly: Maintaining clean condenser coils is vital for optimal performance. Dirty coils hinder heat exchange, resulting in decreased efficiency and overheating. Regular cleaning can prevent this buildup. For example, a study by the U.S. Department of Energy demonstrates that cleaning coils can improve system efficiency by up to 30%.
-
Check and replace filters as needed: Filters play a crucial role in airflow and system efficiency. Clogged filters can restrict airflow and strain the system. Therefore, regularly checking and replacing filters is necessary to ensure optimal airflow. According to the EPA, changing filters every 1 to 3 months can help maintain good air quality and efficiency.
-
Inspect and tighten electrical connections: Electrical connections may loosen over time and can lead to short circuits or system failures. Regularly inspecting and tightening these connections ensures a safe and effective operating environment. The U.S. Consumer Product Safety Commission highlights that loose electrical connections are a common hazard that can lead to overheating.
-
Monitor coolant levels: Adequate coolant levels are critical for the efficient operation of your water chiller. Low coolant levels can lead to insufficient cooling and potential damage. Checking the coolant level and ensuring it meets manufacturer specifications can help maintain performance. Research conducted by the International Institute of Refrigeration indicates that correct coolant levels extend equipment lifespan.
-
Ensure proper drainage of condensation: Proper condensation drainage prevents water buildup, which can lead to mold growth and system inefficiencies. Inspecting and maintaining the drainage system regularly is essential. A breakdown in drainage can cause water to overflow, leading to damage. Studies show that addressing condensation issues can significantly enhance the unit’s longevity.
-
Evaluate the overall system for leaks or damages: Regularly checking your water chiller for leaks or physical damages is crucial. Small leaks or unnoticed damage can escalate into more significant issues. Conducting periodic evaluations helps identify potential problems early. The U.S. Department of Energy emphasizes proactive maintenance as a method to avoid costly repairs and extend equipment life.
What Are the Additional Uses of a Water Chiller in Gardening and Other Applications?
Water chillers have various uses in gardening and other applications beyond just cooling water. They help in maintaining optimal temperatures, enhancing plant growth, and improving water quality.
- Hydroponic Systems
- Aquarium Cooling
- Climate-Controlled Greenhouses
- Cool Root Zone for Outdoor Plants
- Wine and Beverage Cooling
- Industrial Water Cooling
- Medical Applications (e.g., cooling in hospitals)
Water chillers in hydroponic systems maintain the temperature of the nutrient solution. Hydroponics is a method of growing plants without soil, using mineral nutrient solutions in an aqueous solvent. Maintaining a consistent temperature can prevent root diseases and promote healthy growth.
Water chillers in aquarium cooling reduce water temperature, which helps in maintaining a suitable environment for various aquatic species. Fish, such as Betta and certain corals, thrive best at specific temperatures. A study by O’Neil et al. (2019) states that temperature fluctuations can harm fish health.
Water chillers in climate-controlled greenhouses regulate air and soil temperature. Proper temperature management can enhance plant growth and yield. According to the National Greenhouse Manufacturers Association, optimal greenhouse conditions improve crop productivity by 15-20%.
Water chillers also provide a cool root zone for outdoor plants during hot weather. This practice is beneficial for sensitive plants, which may suffer stress due to excessive heat. A report by the University of Florida (2021) emphasizes that maintaining cooler soil temperatures can result in healthier root systems.
Water chillers are used for cooling wine and beverages. The wine industry often requires specific serving temperatures to enhance taste. Studies indicate that red wines should be served cooler than room temperature to minimize harsh flavors.
Water chillers serve industrial purposes by cooling processes and machinery. Manufacturing facilities often need specific temperature controls to ensure equipment operates efficiently. This minimizes overheating and prolongs equipment lifespan.
Water chillers are also applicable in medical settings for patient cooling, particularly during surgeries. Controlled cooling can reduce the risk of heat-related complications during procedures, according to a study published by the Journal of Clinical Anesthesia in 2020.
Related Post: