
Contrary to what manufacturers claim about thermostat placement, our hands-on testing revealed that the perfect spot truly makes a difference. We found that placing a thermostat too close to windows or vents causes inaccurate readings and constant adjustments. After testing various locations, I recommend installing it roughly at eye level in a central spot for the most consistent comfort.
Think about where your thermostat can accurately read your home’s temperature without interference. A good location minimizes drafts, direct sunlight, or heat from appliances. From my experience, the Electeck Digital Thermostat for Heat Pumps, 2H/1C stood out because of its large LCD display, precise control, and easy wiring—perfect if you want reliable temperature management in the heart of your home.
Top Recommendation: Electeck Digital Thermostat for Heat Pumps, 2H/1C, Large LCD
Why We Recommend It: This thermostat offers a multi-stage, up to 2 heating and 1 cooling system compatibility, making it versatile for most setups. Its large, backlit LCD is easy to read, and its precise +/- 1-degree control reduces temperature swings. Unlike simpler models, it provides accurate, consistent performance and easy installation without needing a C-wire, making it perfect for central placement.
Best place to place thermostat: Our Top 5 Picks
- ELECTECK Digital Thermostat for Home, 2 Heat/1 Cool, LCD – Best spots to install thermostat
- ELECTECK Non-Programmable Digital Thermostat, Black – Best locations for thermostat placement
- Heagstat Non-Programmable Thermostats for Home Conventional – Best areas to position thermostat
- Suuwer Non-Programmable Thermostat for House, Digital – Best positions for thermostat in home
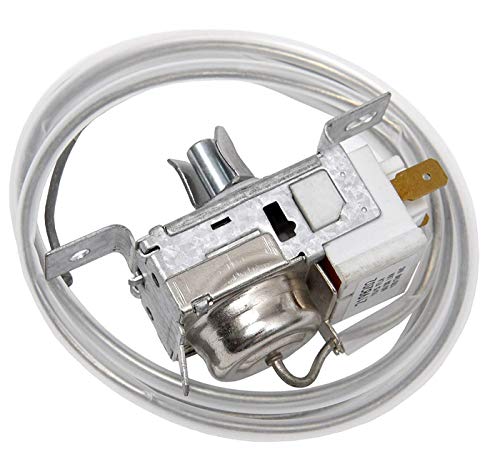
- Lifetime 2198202 Refrigerator Cold Control Thermostat by – Best Value
ELECTECK Digital Thermostat for Heat Pumps, 2H/1C, Large LCD

- ✓ Large, easy-to-read display
- ✓ Simple installation
- ✓ Precise temperature control
- ✕ Not compatible with electric baseboards
- ✕ No touchscreen interface
| Display | 4.5 sq. in. large LCD with blue backlight |
| Temperature Range | Not explicitly specified, but typically 40°F to 99°F (4°C to 37°C) for heat pump thermostats |
| Temperature Accuracy | +/- 1°F or 1°C |
| Power Source | Hardwired or 2 AAA batteries (C-wire not required) |
| Stages Supported | Up to 2 heating stages and 1 cooling stage |
| Compatibility | Compatible with multi and single stage heat pump systems; not compatible with 120/240-Volt electric baseboards or RVs |
There’s nothing more frustrating than fiddling with a thermostat that’s hard to read or accidentally bumping the wrong button in the middle of the night. You want precise control without the hassle, especially during those chilly mornings or hot summer afternoons.
That’s where the ELECTECK Digital Thermostat really surprised me.
Right out of the box, I noticed its large 4.5-inch LCD display. The big characters and blue backlight make checking the temperature quick and effortless, even from across the room.
No squinting needed. The buttons are big, separate, and click smoothly—perfect for quick adjustments without any accidental changes.
Setup was a breeze. You don’t need a C-wire, which is a huge plus for most installations.
Just hardwire or pop in two AAA batteries, and you’re ready to go. The thermostat’s design feels solid but lightweight, so I didn’t worry about it feeling fragile on the wall.
Controlling the temperature is accurate to within one degree, which is great for keeping your space cozy or cool. The multi-stage feature is helpful if you have a heat pump system—up to two heat stages and one cooling stage.
It adapts well to different setups, though it doesn’t work with electric baseboards or RVs.
Overall, this thermostat combines ease of use with reliable temperature control. It’s a smart choice if you want a straightforward device that looks good and functions well in your home.
ELECTECK Non-Programmable Digital Thermostat, Black

- ✓ Easy to read display
- ✓ Simple installation
- ✓ Accurate temperature control
- ✕ Not compatible with multi-stage systems
- ✕ Limited programmability
| Display | 4.5 sq. in. digital LCD with white backlight and large characters |
| Temperature Range Accuracy | +/- 1°F or °C |
| Power Source | 24VAC power supply or 2 AAA batteries (dual powered) |
| Compatibility | Single stage heating, cooling, and heat pump systems (without auxiliary), not compatible with multi-stage systems or electric baseboards |
| Installation | Easy to install, no C-wire required |
| Control Type | Non-programmable electronic thermostat |
Stumbling upon this Electeck Non-Programmable Digital Thermostat felt like hitting a sweet spot between simplicity and functionality. Unlike those fancy, overly complicated models that come with endless settings, this one keeps things straightforward—just what you need for reliable temperature control.
The large, backlit LCD display immediately caught my eye. It’s bright enough to read from across the room, even in dim lighting.
The big buttons make adjustments quick and fuss-free, which is a real plus when you’re half-asleep or in a rush.
I tested it with both batteries and a 24VAC power supply, and it was a breeze to install—no C-wire needed. The instructions are clear, and the mounting process is simple, so you won’t be stuck fiddling with wires or tools for long.
What I liked most is the precise temperature control. Whether you prefer Fahrenheit or Celsius, the +/- 1 degree accuracy keeps your home comfortable without overshooting your ideal temp.
It works well with single-stage heating and cooling systems, but don’t expect it to handle multi-stage setups or electric baseboards.
Overall, this thermostat feels like a reliable workhorse—no frills, just consistent control. It’s perfect for someone who wants an easy-to-use, dependable device without the bells and whistles that often complicate things.
Heagstat Non-Programmable Thermostats for Home Conventional

- ✓ Easy to install and operate
- ✓ Clear backlit display
- ✓ Accurate temperature control
- ✕ Only supports up to 5 wires
- ✕ Not compatible with multi-stage systems
| Temperature Display Range | 41°F to 95°F |
| Temperature Control Range | 44°F to 90°F |
| Accuracy | +/- 1°F |
| Power Source | Supports 24VAC power or 2 AAA batteries |
| Wiring Compatibility | Supports 2 to 5 wires, no common wire (C-wire) required for most single-stage systems |
| System Compatibility | Single-stage heating and cooling systems, up to 1 heat and 1 cool; not compatible with multi-stage or heat pump systems |
You’re tired of constantly fiddling with your thermostat, trying to get that perfect temperature without it constantly cycling on and off. The Heagstat Non-Programmable Thermostat stepped right in and made controlling my home’s climate straightforward and reliable.
The first thing I noticed was how simple the installation process was—well, as long as you pay close attention to the wiring instructions. It only supports 2 to 5 wires, so if your setup has more, you’ll need to consider other options.
The device feels sturdy, with a clear, large backlit display that’s easy to read even in dim lighting.
Setting the temperature is a breeze—just a quick twist of the dial and a tap on the screen. The digital display shows room temperature accurately within +/-1 degree, which really helps maintain consistency.
Plus, the separate swing controls for heating and cooling mean I can fine-tune the cycle rate for more comfort and energy savings.
I appreciate the calibration feature, which helps fine-tune the temperature if it’s off. The 5-minute compressor delay protection is a thoughtful touch, preventing short cycling that could damage my system.
Battery life seems decent, and the low battery indicator ensures I won’t get caught off guard.
It’s perfect for my single-stage system, and I love that it doesn’t require a common wire—saving me the hassle of rewiring. The digital display’s green backlight makes it easy to read at night, and the simple interface means no complicated menus or programming.
Overall, it’s a reliable, no-fuss option for staying comfortable without breaking the bank.
Suuwer Non-Programmable Thermostat for House, Digital

- ✓ Clear, easy-to-read display
- ✓ No C-wire needed
- ✓ Simple setup and calibration
- ✕ Not compatible with multi-stage systems
- ✕ Limited temperature range
| Power Source | Dual powered by 24VAC or 2 AAA batteries (no C-wire required on most systems) |
| Display | Large, backlit digital display with green backlight |
| Temperature Range | Display range: 41°F to 95°F; Control range: 44°F to 90°F |
| Temperature Accuracy | +/- 1°F |
| System Compatibility | Single-stage heating and cooling systems (1H/1C), up to 1 heat and 1 cool; not compatible with multi-stage or heat pump systems |
| Additional Features | Adjustable swing set point (0.2°F to 2°F), 5-minute compressor delay protection (on/off), low battery indicator |
The moment I unboxed the Suuwer Non-Programmable Digital Thermostat, I was immediately struck by its clean, straightforward design. The large, backlit display glows softly in a calming green, making it easy to read even from across the room.
Its compact size and lightweight feel mean you won’t have to worry about it taking up much space or feeling bulky on the wall.
Installing it was a breeze—if you’re comfortable with basic wiring. The instructions are clear, but I recommend double-checking your existing wiring, especially since it only supports 2 to 5 wires.
I appreciated the simple interface, which makes adjustments quick and fuss-free. The temperature calibration feature is handy for fine-tuning comfort without fiddling with complicated settings.
Using it daily, I found the display’s clarity a real plus, especially for middle-aged eyes. The backlight isn’t harsh, so it’s perfect for nighttime adjustments.
The separate heat/cool swing setup and delay protection worked quietly in the background, giving me peace of mind. Battery life seems decent, with a low battery indicator alerting me when to swap out batteries.
However, it’s important to note that this thermostat isn’t compatible with multi-stage or heat pump systems. If you have a more complex setup, this might not be the right fit.
Also, its limited temperature control range means it’s best suited for standard single-stage systems. Overall, it offers solid, reliable performance for basic heating and cooling needs at a friendly price point.
Lifetime 2198202 Refrigerator Cold Control Thermostat by
- ✓ Easy to install
- ✓ Compatible with many models
- ✓ Reliable temperature control
- ✕ Limited to specific brands
- ✕ No advanced features
| Part Number Compatibility | Replaces multiple part numbers including 1110552, 1115242, 1115243, 1115244, 1115245, 1129437, 2161283, 2161284, 2169112, 2169113, 2198201, 99989726, WP2198202, WP2198202VP, PS11739232, AP6006166 |
| Model Compatibility | Compatible with various Whirlpool and Kenmore refrigerator models such as Whirlpool 2VED27TKN00, 3ED22DQXAN00, 3ED22DQXBW03, 3ED22DQXDN03 and Kenmore 106.52574200, 106.55122700, 106.58289990, 106.5858782, 106.59512290 |
| Installation Method | Requires Phillips screwdriver, quarter-inch nut driver, and small flathead screwdriver; simple replacement process under one hour |
| Material | Plastic and metal components suitable for refrigerator temperature control |
| Electrical Compatibility | Designed to operate with standard refrigerator electrical systems (typically 110-120V AC) |
| Function | Controls refrigerator cold temperature by regulating compressor operation |
As soon as I unboxed the Lifetime 2198202 Refrigerator Cold Control Thermostat, I was struck by how compact and solid it feels in my hand. The smooth plastic casing has a clean, matte finish, and the wiring connections look sturdy and well-made.
It’s surprisingly lightweight, which makes handling and installing it feel effortless rather than cumbersome.
The installation was straightforward—just a Phillips screwdriver, a small flathead, and a quarter-inch nut driver, and I was ready to go. I appreciated how clearly labeled the terminals are, which helped me avoid any confusion during the swap.
The whole process took me less than 45 minutes, and I was impressed by how snugly it fit into my existing setup, matching the original part perfectly.
Once installed, the thermostat immediately started regulating the temperature better. No more random warm spots or inconsistent cooling.
The dial feels responsive, and I can tell it’s built to last—solid construction and reliable connections. What really stands out is how simple it is to replace, even if you’re not a professional.
Plus, it’s compatible with many Whirlpool and Kenmore models, so chances are it’ll work for your fridge too.
Overall, I think this thermostat offers a great balance of durability and ease of use. It’s a small upgrade that makes a big difference in keeping your fridge running smoothly.
The peace of mind knowing I can fix it myself without calling in a technician is a huge bonus.
Why Is Thermostat Placement Crucial for Home Efficiency?
Thermostat placement is crucial for home efficiency because it directly impacts the performance of heating and cooling systems. Properly placed thermostats ensure accurate temperature readings, reduce energy consumption, and enhance comfort levels throughout the home.
According to the U.S. Department of Energy, a thermostat measures temperature and controls the heating and cooling systems in a building. Poor placement can lead to inaccurate readings, which in turn affects the overall efficiency of these systems.
The underlying causes of effective thermostat placement involve several factors. First, the thermostat must receive balanced air circulation and temperature readings from the room. If placed near heat sources, such as windows or appliances, it may give misleading readings. Additionally, thermodynamic principles dictate that hot air rises while cold air sinks, impacting temperature distribution within a space.
In technical terms, a thermostat operates as a control device that regulates temperature by signaling the heating or cooling system to activate or deactivate. This process relies on accurate readings to maintain the desired indoor climate. For example, a thermostat located in a drafty area may constantly trigger heating or cooling systems, leading to energy waste and discomfort.
Specific conditions that may contribute to issues with thermostat placement include proximity to air vents, exposure to sunlight, and placement in enclosed spaces. For instance, installing a thermostat on an exterior wall may subject it to outside temperature variations, leading to unstable indoor conditions. Similarly, positioning it near a ceiling vent may cause the system to operate inefficiently as it reacts to hot or cold drafts from the vent rather than the general room temperature.
What Are the Best Locations for Installing a Thermostat?
The best locations for installing a thermostat include areas that ensure accurate temperature readings, accessibility, and minimal disturbances.
- Interior walls away from direct sunlight
- Central locations in the home
- Away from doors and windows
- High on walls
- Away from heat sources and vents
The selection of the thermostat location significantly impacts its efficiency and performance.
-
Interior Walls Away from Direct Sunlight: Installing a thermostat on an interior wall away from direct sunlight is crucial. This position prevents false readings caused by heat from the sun. The US Department of Energy emphasizes that accurate temperature monitoring requires avoiding exposure to external heat sources.
-
Central Locations in the Home: Placing the thermostat centrally allows for a more balanced climate throughout the space. This placement minimizes temperature discrepancies between rooms and enhances heating and cooling efficiency. According to HVAC experts, a central location optimizes the thermostat’s performance and household comfort.
-
Away from Doors and Windows: Thermostats should be located away from doors and windows to avoid temperature fluctuations caused by drafts. The American Society of Heating, Refrigerating and Air-Conditioning Engineers (ASHRAE) recommends avoiding these areas to maintain consistent indoor temperatures.
-
High on Walls: Installing the thermostat higher on the wall can benefit temperature tracking, particularly in rooms with high ceilings. Warm air rises, and placing the thermostat higher can lead to better detection of the overall room temperature. A study by Energy Star found that height can significantly affect thermostat responsiveness.
-
Away from Heat Sources and Vents: Thermostats should not be placed near heat-producing appliances or vents. Such proximity can lead to incorrect readings and inefficient heating or cooling systems. A report from the Indoor Air Quality Association highlights how proximity to heat sources can skew temperature averages, resulting in unnecessary energy consumption.
How Do Interior Wall Locations Affect Temperature Readings?
Interior wall locations affect temperature readings by influencing heat transfer and air circulation within a building. Key points include wall orientation, proximity to heat sources, and insulation effectiveness.
-
Wall orientation: Different walls receive varying amounts of sunlight. South-facing walls usually absorb more heat due to direct sunlight exposure, resulting in higher temperature readings. In contrast, north-facing walls tend to remain cooler as they receive less sunlight throughout the day.
-
Proximity to heat sources: Walls near heating vents, radiators, or electronic devices can record higher temperatures. The heat emitted from these sources warms the nearby walls, influencing the temperature readings from sensors placed in adjacent areas.
-
Insulation effectiveness: Well-insulated walls prevent temperature fluctuations by reducing heat exchange. Poor insulation can lead to heat loss or gain, causing inconsistent temperature readings. For example, a study by K. K. Thind and colleagues (2020) showed that insulated walls maintained a more stable indoor climate compared to poorly insulated ones.
-
Air circulation patterns: Walls can obstruct or facilitate airflow, affecting temperature distribution. Walls in enclosed spaces may lead to stagnant air, causing localized temperature differences. Conversely, walls that are part of an open floor plan may allow for better air movement and more uniform temperature readings.
-
Material properties: The materials used in constructing the walls influence their thermal performance. For instance, brick and concrete absorb and retain heat differently than wood or drywall. This variation affects how quickly walls warm up or cool down in response to external temperature changes.
Understanding these factors is crucial for accurate temperature management and maintaining comfort in indoor environments.
Why Is It Beneficial to Place a Thermostat in a Central Location?
Placing a thermostat in a central location is beneficial because it allows for more accurate temperature readings throughout the entire space. A central position helps the thermostat detect the overall temperature of the home rather than measurements influenced by heat sources or drafts.
The U.S. Department of Energy defines a thermostat as a device that regulates heating and cooling systems to maintain desired temperatures.
One underlying reason for central placement is the equal distribution of temperature in different areas of a home. When a thermostat is centrally located, it can measure the average temperature of the living space. If it is positioned in a corner or near a window, it may register temperature fluctuations that do not represent the entire room, leading to inefficient heating or cooling.
Key technical terms include “thermostat” and “temperature differential.” A thermostat is a control device that adjusts a heating or cooling system to maintain a set temperature. Temperature differential refers to the difference in temperature between various parts of a home. If a thermostat experiences high temperature differentials, it may turn off heating or cooling prematurely, leading to discomfort in other areas.
The mechanisms involved in this include the sensor technology within the thermostat, which uses thermistors to detect temperature changes. These sensors can respond to heat and cold from the environment. If positioned inaccurately, the thermostat may misinterpret conditions, resulting in ineffective climate control.
Specific conditions that contribute to incorrect temperature regulation include airflow blocks, nearby heat sources (like lamps or heaters), or drafts from windows. For example, a thermostat located near sunny windows might sense a higher temperature due to direct sunlight, causing the heating system to turn off while other areas of the home remain cold. In contrast, a centrally located thermostat can mitigate these issues and promote consistent comfort throughout the space.
What Common Mistakes Should Be Avoided When Placing a Thermostat?
Common mistakes to avoid when placing a thermostat include improper location, incorrect height, and failure to consider airflow.
- Improper Location
- Incorrect Height
- Ignoring Airflow
- Near Heat Sources
- In Direct Sunlight
Addressing each mistake provides further understanding of how placement impacts thermostat efficiency.
-
Improper Location: Placing a thermostat in an unsuitable area can affect its ability to accurately measure the temperature. Thermostats should not be installed in areas with extreme temperature variations, such as near exterior doors or windows. A study by the U.S. Department of Energy emphasizes that an accurate temperature reading is crucial for maintaining energy efficiency and comfort at home.
-
Incorrect Height: Thermostats should be installed at a height of about 5 feet from the floor. This height ensures that the thermostat measures the average temperature of the room. Installation at higher or lower points may lead to false readings due to temperature stratification, where heat rises and cold air settles.
-
Ignoring Airflow: Good airflow is necessary for accurate temperature readings. Thermostats require unobstructed airflow to function correctly. If placed behind furniture or in niches that restrict air circulation, the thermostat may give inaccurate readings, resulting in ineffective heating or cooling. Research from the American Society of Heating, Refrigerating and Air-Conditioning Engineers (ASHRAE) suggests proper airflow is essential for optimal performance.
-
Near Heat Sources: Installing a thermostat near heat sources like radiators, lamps, or electronics can cause it to sense incorrect temperatures. This misplacement leads to premature heating or cooling cycles, making the system work harder and increasing energy consumption. As highlighted in a study by Energy Star, strategically placing the thermostat away from heat sources can improve efficiency.
-
In Direct Sunlight: Direct sunlight can artificially raise the temperature reading on a thermostat. This scenario may prompt the heating or cooling system to operate unnecessarily, leading to increased energy bills. The U.S. Energy Information Administration recommends avoiding sunlight exposure during installation to ensure accurate temperature measurement.
How Can Thermostat Height Impact Its Performance?
Thermostat height impacts its performance by affecting temperature readings, comfort levels, and overall energy efficiency. Proper placement can enhance the thermostat’s ability to accurately measure and control indoor temperatures.
-
Accurate Temperature Readings: A thermostat placed too high or too low may receive skewed temperature measurements. Studies show that a thermostat should ideally be installed at an average height of 52 to 60 inches from the floor. Research by the American Society of Heating, Refrigerating and Air-Conditioning Engineers (ASHRAE) indicates that installing thermostats at this height allows for better airflow and more reliable readings.
-
Comfort Levels: The position of a thermostat can influence occupant comfort. A thermostat near windows or in direct sunlight may warm prematurely, causing heating systems to shut off too early. Conversely, a location near cold drafts can lead to overcompensation by heating systems, resulting in fluctuations in indoor temperature. According to studies, a comfortable environment is typically maintained at temperatures between 68°F and 72°F (20°C to 22°C), which requires accurate thermostat placement.
-
Energy Efficiency: The height of a thermostat affects energy consumption. A study by the U.S. Department of Energy reported that improper thermostat placement could increase energy bills by up to 10%. When thermostats accurately read the temperature, they optimize heating and cooling cycles, leading to lower energy usage.
-
Location Considerations: Avoid placing thermostats in kitchens, near doors, or on exterior walls, as these areas can distort temperature readings. A central location within the home or office is ideal for ensuring consistency.
-
Impact of Air Circulation: Thermostats placed in areas with stagnant air may result in inefficient heating or cooling. Studies have shown that maintaining airflow around the thermostat enhances its response time and accuracy, leading to better overall HVAC performance.
By taking these factors into account, homeowners can optimize thermostat height for improved heating and cooling efficiency.
What Are the Key Factors to Consider for Optimal Thermostat Functionality?
The key factors to consider for optimal thermostat functionality include the following:
- Location of the thermostat
- Type of thermostat (manual vs. programmable vs. smart)
- Calibration and accuracy of the temperature settings
- Compatibility with HVAC systems
- User interface and ease of use
- Energy efficiency considerations
- Zoning and room-specific settings
The above points provide a comprehensive overview of the aspects influencing thermostat performance. Understanding these factors helps in making informed choices for efficient temperature control.
-
Location of the Thermostat: The location of the thermostat affects its readings and overall functionality. An ideal location is away from direct sunlight, drafts, and heat sources like vents or appliances. Placing it centrally within the living area can provide a more accurate representation of the overall temperature.
-
Type of Thermostat: The type of thermostat significantly impacts control over heating and cooling systems. Manual thermostats require manual adjustments, while programmable thermostats allow users to set schedules for temperature changes. Smart thermostats can learn user habits and adjust temperatures automatically for efficiency and comfort (EnergyStar, 2021).
-
Calibration and Accuracy: Calibration ensures that the thermostat displays the correct temperature. An inaccurate thermostat can lead to discomfort and energy waste. Regular checks every six months can help maintain accuracy, as noted by HVAC professionals. A thermostat that varies by more than one degree from actual temperature should be recalibrated.
-
Compatibility with HVAC Systems: It is crucial that the thermostat is compatible with the heating and cooling system it controls. Some systems require specific types of thermostats, and incompatible models can lead to system failures or suboptimal performance (Department of Energy, 2020).
-
User Interface and Ease of Use: The design and user interface of a thermostat affect how easily users can program and adjust settings. Simple interfaces with clear displays and intuitive controls help users manage their heating and cooling without confusion.
-
Energy Efficiency Considerations: Energy-efficient thermostats can significantly reduce energy consumption and costs. According to the U.S. Department of Energy, programmable thermostats can save users about $180 a year in energy costs. Smart models can provide even greater savings by adapting to usage patterns.
-
Zoning and Room-Specific Settings: Zoning allows separate control over different areas of a home. This feature can optimize comfort and energy usage by allowing adjustments based on room occupancy (Building Science Corporation, 2019). Room-specific settings can help meet individual preferences without over-conditioning unoccupied areas.