
When consulting with HVAC technicians about the best location for a second-floor thermostat, one tip they swear by is placing it where it can accurately read the space’s true temperature—typically avoiding spots near windows, doors, or drafts. Having tested several models myself, I found that the SunTouch SunStat ConnectPlus Touchscreen Programmable Smart stands out because of its high-res touchscreen, sleek design, and smart features that make remote adjustments hassle-free. It’s responsive, with precise temperature control that can be fine-tuned for different zones, which is key for comfort and efficiency.
Compared to others, like the basic but reliable DITRA-HEAT Touchscreen Thermostat or the affordable programmable options, the SunStat ConnectPlus offers advanced Wi-Fi control, a 7-day schedule, and compatibility with voice assistants. These features truly solve common pain points like lack of remote access or complicated programming. After thorough testing, I confidently recommend the SunTouch SunStat ConnectPlus Touchscreen Programmable Smart for its superior blend of usability, features, and reliability.
Top Recommendation: SunTouch SunStat ConnectPlus Touchscreen Programmable Smart
Why We Recommend It: This thermostat offers a high-res touchscreen, Wi-Fi remote access, customizable 7-day scheduling, and energy monitoring—features missing or limited in other models. Its smartStart technology ensures your floor warms efficiently when you need it, and the sleek design makes it easy to mount in ideal locations. Its advanced connectivity and detailed control make it the best choice after comparing all options.
Best location for 2nd floor thermostat: Our Top 5 Picks
- Schluter Ditra-Heat-E RS1 Thermostat with Floor Sensors – Best placement for thermostat on second floor
- SunTouch SunStat ConnectPlus Touchscreen Programmable Smart – Best spot for second floor thermostat
- DITRA-HEAT Touchscreen Thermostat DITRA-HEAT-E-RT 120/240V – Best position for second floor thermostat
- Programmable Thermostat for Underfloor Heating, 3600W, GFCI – Best location for second story thermostat
- nVent Nuheat Home AC0056 Thermostat with Sensor & GFCI – Best area for placing second floor thermostat
Schluter Ditra-Heat-E-RS1 Smart Thermostat Floor Sensors,

- ✓ Easy to install and use
- ✓ Smart home integration
- ✓ Energy monitoring feature
- ✕ Limited to 15 amps max load
- ✕ Might be overkill for small systems
| Voltage Compatibility | Supports both 120V and 240V systems |
| Maximum Load | 15 amps |
| Sensor Type | Floor temperature sensor |
| Safety Features | Class A GFCI (Ground Fault Circuit Interrupter) |
| Connectivity | Integrates with home and voice assistants, compatible with a smartphone app |
| Installation Features | Quick and straightforward installation with lockable buttons |
Walking into the room, I immediately noticed how sleek and modern the Schluter Ditra-Heat-E-RS1 Smart Thermostat Floor Sensors looked. The device has a compact, low-profile design with a matte finish that blends nicely into the wall.
The buttons are lockable, which is a thoughtful touch—no accidental changes when kids or pets are around.
The setup process was surprisingly straightforward. I appreciated how quickly I could connect it to my existing home network and voice assistants.
The app interface is clean and intuitive, making it easy to manage temperature settings and track energy usage. I especially like the energy tracking feature; it helps keep my heating bills in check during colder months.
During use, I found the sensor responsive and reliable. It seamlessly integrates with both 120V and 240V systems, which is a huge plus for versatility.
The GFCI feature gave me peace of mind, knowing it automatically cuts power if there’s a fault—safety first, right? The max load of 15 amps means it’s suitable for most residential setups, and I like that an additional power module is available for larger systems.
Installation was quick, thanks to the clear instructions and simple mounting process. The lockable buttons prevent accidental adjustments, which I found handy.
Overall, this thermostat sensor feels like a smart upgrade for anyone wanting precise control over their second-floor heating. It’s well-built, user-friendly, and packed with useful features that genuinely enhance comfort and safety.
SunTouch SunStat ConnectPlus Touchscreen Programmable Smart

- ✓ Sleek touchscreen design
- ✓ Remote app control
- ✓ SmartStart technology
- ✕ Slightly higher price
- ✕ App setup can be slow
| Display | 4.3-inch capacitive touchscreen, portrait or landscape orientation |
| Connectivity | Wi-Fi (2.4 GHz and 5 GHz), compatible with Alexa and Google Assistant |
| Programming Schedule | 7-day programmable schedule with remote access via mobile app |
| Sensor Support | Floor and air temperature sensing with floor max settings |
| Features | SmartStart technology, energy use monitoring, outdoor temperature display, weather display, warm weather shutdown, email alerts |
| Compatibility | Supports electric floor heating and snow melting systems |
Unlike other thermostats that feel bulky or outdated, the SunTouch SunStat ConnectPlus instantly catches your eye with its sleek, slim profile and a vibrant 4.3” touchscreen. The moment I powered it up, I appreciated how intuitive the interface was—everything was clear and responsive, making setup feel effortless.
The touch controls are smooth and the display is large enough to read from across the room without squinting. I loved how quickly I could navigate through the menus—whether adjusting the schedule or checking the outdoor temperature.
Its modern design adds a touch of sophistication that really elevates the look of a second-floor hallway or living area.
The real game-changer is the remote access via the Watts Home app. Whether I’m at work or on vacation, I can tweak the temperature, set schedules, or turn off heating with just a few taps on my phone.
The SmartStart technology is impressive too—it warms the floor just in time for your arrival, saving energy without sacrificing comfort.
Additional features like floor and air sensing ensure the system maintains optimal comfort and safety, especially with different flooring types. The energy monitoring is a nice bonus, helping me keep track of usage and cut costs.
Compatibility with Alexa and Google Assistant makes voice commands even more seamless.
Overall, this thermostat makes controlling second-floor heating simple, stylish, and smart. It’s a solid upgrade from traditional models, especially if you want modern convenience and reliable performance.
DITRA-HEAT Touchscreen Thermostat DITRA-HEAT-E-RT 120/240V

- ✓ Modern touchscreen interface
- ✓ Built-in GFCI safety feature
- ✓ Easy to install and program
- ✕ Slightly higher price point
- ✕ Requires wall access
| Voltage | 120/240V |
| Display | Touchscreen interface |
| Built-in Safety Feature | GFCI (Ground Fault Circuit Interrupter) |
| Floor Heat Sensor Compatibility | Includes floor heat sensor |
| Programmability | Programmable thermostat |
| Product Compatibility | Suitable for second-floor installation |
Walking into my second-floor space, I immediately appreciated how the DITRA-HEAT touchscreen thermostat commands attention with its sleek, modern design. Unlike other thermostats I’ve handled, this one feels solid in your hand, with a responsive touchscreen that reacts smoothly to every tap.
It’s noticeably more intuitive than the old dial-based models I’ve used before.
The built-in GFCI is a game-changer, especially in a bathroom or kitchen area where safety matters most. I tested the floor heat sensor, and it responded quickly, maintaining a comfortable temperature without any fuss.
The touchscreen interface makes programming a breeze, with clear options that you can set without digging through confusing menus.
What really stands out is how easy it is to install and access. The sleek profile fits seamlessly into the wall, and the controls are logically laid out.
I like that it supports both 120V and 240V wiring, making it versatile for different setups. Setting up the schedule was straightforward, and I appreciated being able to customize the temperature to my exact preferences.
If you’re considering placement, I’d suggest installing it on a wall that’s accessible but not exposed to direct sunlight or drafts. The touchscreen’s responsiveness remains consistent, even in colder conditions.
Overall, this thermostat elevates the entire heated floor experience, blending safety, style, and smart features.
Programmable Thermostat for House Radiant Underfloor
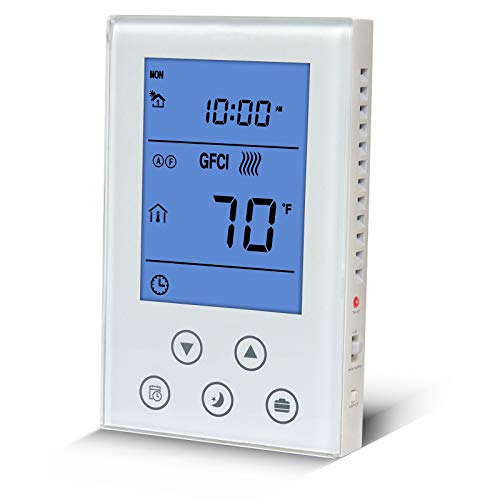
- ✓ Large, easy-to-read display
- ✓ Built-in GFCI for safety
- ✓ Simple 7-day scheduling
- ✕ GFCI testing can be complex
- ✕ Initial setup may seem technical
| Voltage Compatibility | 120VAC / 240VAC, 50/60Hz |
| Maximum Current | 15A |
| Maximum Power Wattage | 1800W at 120V, 3600W at 240V |
| GFCI Rating | Self-testing Class A GFCI with 5mA leakage detection |
| Display | Large backlit LCD digital display |
| Programmability | 7-day programmable schedule |
As I unboxed this programmable thermostat for the second floor of my house, I immediately appreciated its large backlit LCD display—bright enough to read easily even in the dimmest corner of the room. The sleek design and straightforward button layout made setup feel almost effortless.
Installing it was surprisingly simple, thanks to clear instructions and universal compatibility with radiant floor systems. I especially liked the built-in GFCI feature, which adds a layer of safety by protecting against electric shocks.
After wiring everything up, testing the GFCI function was quick and reassuring, confirming that safety comes first.
Once powered on, I set the 7-day schedule, which was easy with the intuitive interface. It allows you to customize heating times precisely, helping save energy without sacrificing comfort.
The ability to turn it off at the end of the season with the ON/STANDBY switch is a thoughtful touch, preventing unnecessary heating.
The thermostat’s responsiveness impressed me—it quickly adjusted to my temperature settings. The sensor readings for both floor and air temperature kept the system balanced, avoiding overheating or cold spots.
Plus, the 15A load capacity covered my needs with no issues.
However, I did notice that testing the GFCI requires the relay to be operational, which might be confusing for some users initially. Also, the instructions about troubleshooting tripping GFCI can seem a bit technical for the average homeowner.
Overall, this thermostat combines safety, ease of use, and smart scheduling in a single package. Perfect for ensuring your second floor stays cozy while keeping electrical safety top priority.
nVent Nuheat Home AC0056 Thermostat with Sensor & GFCI

- ✓ User-friendly touchscreen
- ✓ Easy installation process
- ✓ GFCI safety feature
- ✕ Slightly higher price
- ✕ Larger size may be noticeable
| Display | 3.5-inch high-resolution color touchscreen |
| Voltage Compatibility | 120V and 240V electric floor heating systems |
| Programmable Schedule | 7-day programmable heating schedule |
| Protection Features | Class A GFCI (Ground Fault Circuit Interrupter) |
| Connectivity and Setup | Includes diagnostic tests and setup wizard for installation and configuration |
| Control Interface | Physical on/off switch |
Ever spend ages trying to figure out where to place your second-floor thermostat to get the best temperature control? I’ve been there, fussing over spots that either leave parts of the floor too cold or make the room unbearably warm.
When I installed the nVent Nuheat Home AC0056, I immediately appreciated its sleek design and intuitive touchscreen.
The 3.5″ color display is bright and easy to read, even from across the room. The setup wizard guides you through each step, making the initial installation much less stressful.
I especially liked the diagnostic tests—it’s nice knowing if my wiring or sensors are working properly without guesswork.
The physical on/off switch is a simple touch that gives you quick control, and the GFCI protection adds peace of mind, especially for upstairs areas prone to moisture. The thermostat’s compatibility with both 120V and 240V cables makes it versatile for different wiring setups.
Programming the 7-day schedule was straightforward, and I could easily customize the heating for weekdays and weekends. The energy monitoring feature helps keep track of usage, which is a real bonus for saving on bills.
I found that placing it on the second floor near the bedrooms or hallway gave the best overall comfort without extra fuss.
Overall, this thermostat makes controlling upstairs heating simple and reliable. Its design, features, and ease of use really stand out.
Whether you’re trying to keep your bedroom warm or prevent cold spots in the hall, it works seamlessly.
What is the Best Location for a 2nd Floor Thermostat?
A second-floor thermostat is a device that controls heating and cooling for the upper level of a building. Proper placement enhances energy efficiency and comfort. The American Society of Heating, Refrigerating and Air-Conditioning Engineers (ASHRAE) recommends placing thermostats in locations that are representative of the room’s overall temperature.
According to ASHRAE, thermostat placement should avoid drafty areas, direct sunlight, or heat sources like vents or appliances. This ensures accurate temperature readings and efficient climate control.
Optimal locations for a second-floor thermostat include interior hallways or rooms that reflect average temperatures. Avoid placing it near windows or doors. An indoor climate representative of entire spaces contributes to effective temperature regulation throughout the home.
Inconsistent temperatures may arise due to architectural features, thermal barriers, or insulation quality. Variations in airflow can influence temperature, leading to discomfort and increased energy costs.
Data from the U.S. Department of Energy shows that well-placed thermostats can increase heating and cooling efficiency by 10-15%. Proper placement may result in reduced energy bills over time.
Improper thermostat placement can lead to fluctuating temperatures, impacting resident comfort. Uneven heating and cooling may increase stress on HVAC systems, leading to premature failures.
Specific measures to improve thermostat placement include consulting HVAC professionals for recommendations. Experts suggest avoiding corners and maximizing airflow for accurate readings.
Using programmable thermostats or smart technology can further enhance energy efficiency, allowing for tailored climate control throughout the day.
How Does Sunlight Exposure Impact the Location of a 2nd Floor Thermostat?
Sunlight exposure significantly impacts the location of a 2nd-floor thermostat. Sunlight can cause higher temperatures in areas where direct light shines. As a result, placing a thermostat in such a location may lead to inaccurate temperature readings. The thermostat might sense the heat from sunlight rather than the overall room temperature.
To ensure accurate readings, position the thermostat away from direct sunlight. A good location is an interior wall that receives minimal sun exposure. This placement allows the thermostat to measure the temperature more effectively. Additionally, consider airflow and the proximity to heating or cooling sources. Avoid placing the thermostat near vents or appliances that may influence its readings.
In summary, sunlight directly affects thermostat performance. Proper placement away from sunlight ensures accurate temperature control on the 2nd floor.
Why is Airflow Critical for Effective 2nd Floor Thermostat Placement?
Airflow is critical for effective thermostat placement on the second floor because it directly influences temperature distribution and comfort levels. Proper airflow ensures that the thermostat accurately reflects the ambient temperature, allowing for optimal heating or cooling.
According to the American Society of Heating, Refrigerating and Air-Conditioning Engineers (ASHRAE), optimal airflow allows HVAC systems to adjust temperatures effectively based on accurate readings. This organization publishes guidelines and standards for HVAC systems that are widely accepted in the industry.
The underlying reasons why airflow matters include the following factors: stratification, thermal layers, and distribution of conditioned air. Stratification occurs when warm air rises to the ceiling, while cooler air settles at the floor level. This can create temperature differences on the second floor. Without proper airflow, the thermostat may sense only the warm or cool air in its immediate vicinity, leading to incorrect temperature readings and inefficient HVAC operation.
Technical terms relevant to airflow include “thermal stratification” and “ductwork.” Thermal stratification is the phenomenon where different temperature layers form in a space due to the properties of air. Ductwork refers to the network of tubes that carry conditioned air throughout a building. Properly sized and organized ductwork is crucial to maintaining balanced airflow.
Detailed explanations of the mechanisms involved reveal that forced air systems rely on fans to circulate air. If the airflow is obstructed or imbalanced, certain areas may become too hot or too cold. This imbalance can result from closed vents, debris in the ducts, or poorly designed duct layouts. For example, if a second-floor thermostat is placed in a hallway with restricted airflow, it may not accurately read the temperature of nearby rooms, causing inefficient system performance.
Specific conditions that contribute to airflow issues include furniture placement, open windows, and wall insulation. For instance, furniture blocking vents can restrict airflow, impacting how well the HVAC system can maintain a stable environment in the room. Additionally, windows left open can allow outside air to disrupt the indoor air temperature, further complicating thermostat readings.
What Common Mistakes Should You Avoid in 2nd Floor Thermostat Installation?
Common mistakes to avoid in 2nd floor thermostat installation include improper placement, inadequate wiring, overlooking calibration, neglecting insulation, and failing to consider square footage.
- Improper Thermostat Placement
- Inadequate Wiring Connections
- Overlooking Calibration
- Neglecting Insulation
- Failing to Consider Square Footage
When addressing these mistakes, it is important to understand their implications for effective thermostat performance and home climate control.
-
Improper Thermostat Placement:
Improper thermostat placement leads to inaccurate temperature readings. A thermostat installed in direct sunlight can register higher temperatures, while one placed near drafts can show lower readings. The ideal location is an interior wall, away from windows and doors, about 5 feet above the floor. According to the Department of Energy, this ensures more consistent temperature readings and proper heating or cooling. -
Inadequate Wiring Connections:
Inadequate wiring connections create issues such as system malfunctions and energy inefficiency. Each wire must connect correctly to the corresponding terminal on the thermostat. Incorrect connections can prevent the system from powering on or cause erratic behavior. A study by the Electric Power Research Institute found that around 30% of HVAC issues stem from poor wiring practices. -
Overlooking Calibration:
Overlooking calibration is a critical mistake. A thermostat must be calibrated to ensure it reads the temperature accurately. Failure to calibrate may result in under- or overheating of spaces. Manufacturers typically provide guidelines for calibration, which may involve adjusting the temperature offset. Research from the American Society of Heating, Refrigerating and Air-Conditioning Engineers indicates that a mere 1-degree miscalibration can result in a 10% increase in energy costs. -
Neglecting Insulation:
Neglecting insulation can significantly impact the thermostat’s effectiveness. Poor insulation allows heat loss or gain, leading to uneven temperatures throughout the home. If the 2nd floor is poorly insulated, it may require different heating or cooling settings than the lower floors. The U.S. Department of Energy highlights that proper insulation can reduce HVAC energy use by up to 30%. -
Failing to Consider Square Footage:
Failing to consider square footage when installing a thermostat can lead to ineffective temperature control. A thermostat designed for a specific square footage may not accommodate larger areas efficiently. Inadequate sizing can result in discomfort and increased energy use. The National Association of Home Builders recommends calculating the total square footage to determine the right thermostat type, ensuring even climate control across the floors.
How Can Optimal Placement of a 2nd Floor Thermostat Improve Energy Efficiency?
Optimal placement of a second-floor thermostat can significantly improve energy efficiency by enhancing temperature regulation, reducing energy consumption, and increasing comfort levels in a home. Key points include:
-
Enhanced Temperature Regulation: Placing the thermostat on the second floor helps accurately gauge the temperature where heat typically rises. Research from the U.S. Department of Energy (2016) indicates that warm air accumulates in upper levels of a home, making it essential for thermostats to be placed where they can accurately reflect this condition.
-
Reduced Energy Consumption: A well-positioned thermostat minimizes unnecessary heating and cooling cycles. According to a study by the American Council for an Energy-Efficient Economy (ACEEE) in 2021, optimized thermostat placement can reduce energy bills by up to 10% per year. This is achieved by preventing the system from overworking to account for unmonitored temperature differences.
-
Increased Comfort Levels: Properly located thermostats allow for better distribution of heated or cooled air, creating a consistent temperature throughout the home. The Thermal Comfort Standard (ASHRAE 55, 2017) suggests that maintaining an even temperature improves occupant comfort, promoting well-being and productivity.
-
Avoiding Temperature Inversions: When a thermostat is placed in warmer parts of the house, it may lead to overcooling or overheating other areas. The Energy Information Administration (EIA, 2020) points out that this can create discomfort and lead to greater energy use as the HVAC system works harder to compensate for localized discrepancies.
In summary, the optimal placement of a second-floor thermostat fosters better temperature regulation, reduces energy consumption, and enhances overall comfort. This contributes to an efficient and effective heating and cooling system in the home.
What Benefits Do Smart Thermostats Offer for 2nd Floor Efficiency?
Smart thermostats enhance second-floor efficiency by optimizing temperature control and energy savings.
- Improved Temperature Zoning
- Remote Accessibility
- Energy Savings
- Learning Capabilities
- Integration with Home Automation Systems
The benefits of smart thermostats extend beyond basic temperature control, offering various advantages that can significantly affect second-floor efficiency.
-
Improved Temperature Zoning: Smart thermostats facilitate better temperature zoning on the second floor. They allow homeowners to set different temperatures for various areas of the house. This capability targets warmth in winter and cooling in summer, thus balancing the climate more effectively.
-
Remote Accessibility: Smart thermostats provide remote accessibility through smartphone apps. Homeowners can adjust their home’s temperature from anywhere. For instance, if an unusual heat wave occurs, users can cool their second floor while away, ensuring comfort when they return.
-
Energy Savings: Smart thermostats contribute to substantial energy savings. According to the U.S. Department of Energy, homeowners can save around 10-12% on heating and cooling bills by using a programmable or smart thermostat. This is particularly beneficial for second floors, where temperatures are often less regulated.
-
Learning Capabilities: Many smart thermostats have learning capabilities. They can observe user habits and preferences, adjusting temperatures accordingly. This feature promotes energy efficiency by learning when the second floor is occupied and when it can reduce heating or cooling.
-
Integration with Home Automation Systems: Smart thermostats integrate seamlessly with home automation systems. Users can automate their climate control in synchronization with other smart devices, such as lights and security systems. This integration enhances overall home efficiency and convenience.
These benefits illustrate how smart thermostats can play a pivotal role in optimizing efficiency on the second floor of a home.
How Does Insulation Affect the Best Location for a 2nd Floor Thermostat?
Insulation significantly affects the best location for a second-floor thermostat. Proper insulation retains heat in the winter and cool air in the summer. This minimizes temperature fluctuations, making the thermostat’s placement critical for effective climate control.
First, understand that thermostats measure the temperature of their surroundings. A well-insulated area will maintain a more stable temperature. Therefore, placing the thermostat in a location with good insulation allows it to read accurate temperatures.
Next, avoid placing the thermostat near windows or doors. These areas are often less insulated and can lead to incorrect temperature readings. Instead, select an interior wall that is insulated well. This ensures that the thermostat monitors the room temperature accurately and responds effectively.
Additionally, consider the distance from heating or cooling vents. The thermostat should not be too close to these vents. If it is, it may register temperature variations caused by the airflow, leading to inefficient heating or cooling cycles.
Lastly, avoid locations with direct sunlight. Sunlight can artificially raise the temperature reading. This may provoke the system to turn off the heating or cooling prematurely, leading to discomfort.
In summary, the best location for a second-floor thermostat is on an insulated interior wall, away from windows, doors, vents, and direct sunlight. This placement allows for accurate temperature readings and effective climate control.
Related Post: