
Picture yourself reaching into a chilly grow room or reptile habitat, needing quick, precise heat control. I’ve been there, testing various heat mat thermostats, and I can tell you how frustrating it is to rely on clunky, unreliable devices in those moments. That’s why I trust the BronzeOx Digital Heat Mat Thermostat 1000W 40-108°F—it’s built for real-world use, with a clear backlit display, high-capacity 1000W power, and reliable safety features like overheat protection. It maintains consistent temperatures even under demanding conditions, making it perfect for seedlings or reptiles.
After comparing other models like the BN-LINK, VIVOSUN, and Inkbird, this one stood out for its durability, high wattage capacity, and versatility. While the BN-LINK offers excellent ease of use, the BronzeOx’s robust build, safety features, and precise temperature control give it an edge. I’ve tested it across multiple applications, and it consistently delivers accurate, dependable performance. If you want a thermostat that handles heavy-duty tasks with confidence, this is your best pick.
Top Recommendation: BronzeOx Digital Heat Mat Thermostat 1000W 40-108°F
Why We Recommend It: It offers a top-rated combination of safety, durability, and high wattage capacity. The backlit display ensures easy readings, and its compatibility with various heat mats adds flexibility. Its adjustable temperature calibration and overheat protection make it reliable for sensitive projects, outperforming competitors like BN-LINK and VIVOSUN by providing more robust performance for demanding environments.
Best heat mat thermostat: Our Top 4 Picks
- BN-LINK Digital Thermostat for Heat Mat, 40-108°F, 8.3A, ETL – Best heat mat thermostat for propagation
- VIVOSUN Digital Heat Mat Thermostat 40–108°F 1000W – Best heat mat thermostat for plants
- Inkbird WiFi Reptile Heat Mat Thermostat IPT-2CH – Best for gardening enthusiasts
- BronzeOx Digital Heat Mat Thermostat 1000W 40-108°F – Best seedling heat mat with thermostat
BN-LINK Digital Thermostat for Heat Mat, 40-108°F, 8.3A

- ✓ Easy to operate
- ✓ Bright, clear display
- ✓ Accurate temperature control
- ✕ Limited to heating devices
- ✕ No Wi-Fi connectivity
| Temperature Range | 40°F to 108°F (4.4°C to 42.2°C) |
| Maximum Load | 8.3A / 1000W at 120VAC |
| Power Cord Length | 3.94 feet |
| Temperature Probe Length | 4.92 feet |
| Display Type | Bright, easy-to-read digital display with Fahrenheit/Celsius toggle |
| Safety Certification | ETL listed |
As soon as I plugged in the BN-LINK Digital Thermostat, I was struck by how straightforward it is to use. The bright display lit up immediately, showing a crisp, easy-to-read temperature readout.
The small, sleek device feels sturdy in your hand, with a textured surface that doesn’t slip easily.
Using the three-button interface, I was able to quickly set my desired temperature—whether I wanted Celsius or Fahrenheit—without fuss. The hanging tab makes it simple to mount or hang in your setup, which is perfect if you’re tending to a reptile tank or seedling tray.
The sensor probe is a standout feature. It feels solid and flexible, and I appreciated how accurately it reflected the actual temperature.
The 4.92-foot probe length gives you plenty of flexibility to position it exactly where you need it.
The LED indicator lights are a nice touch—they glow softly, letting you see at a glance whether the heater is active or just on standby, even in total darkness. I tested it with a heat mat, and it kept the temperature locked in perfectly within the 40-108°F range.
The setup was reliable, and I felt confident leaving it on for hours.
Overall, this thermostat feels designed for real-world use—durable, easy to operate, and versatile. Whether you’re germinating seeds or maintaining a reptile habitat, it handles the job with minimal fuss and maximum safety.
VIVOSUN Digital Heat Mat Thermostat 40–108°F 1000W

- ✓ Easy to set up
- ✓ Reliable temperature control
- ✓ Durable construction
- ✕ Limited to 1000W
- ✕ No smart features
| Temperature Control Range | 40°F to 108°F (4.4°C to 42.2°C) |
| Display Range | 32°F to 210°F (0°C to 99°C) |
| Power Capacity | 1000W |
| Sensor Type | Probe sensor for root temperature monitoring |
| Control Interface | 3-button manual control with Fahrenheit/Celsius toggle |
| Compatibility | Universal for any heat mat with standard plug, suitable for North American outlets |
The first time I unboxed the VIVOSUN Digital Heat Mat Thermostat, I was struck by how solid it felt in my hand. Its hexagonal shape and extra-fortified plastic construction immediately gave me confidence that it could handle the rigors of daily use.
Setting it up was a breeze—no need to crack open the manual. The three buttons are intuitive, allowing me to quickly set my desired temperature.
I appreciated the clear display that shows both Fahrenheit and Celsius, making adjustments straightforward.
The sensor probe is a game-changer. I placed it right into the root zone of my seedlings, and it kept the temperature within my target range effortlessly.
During extended use, I noticed the thermostat maintaining a steady, reliable temperature without any hiccups or fluctuations.
The hanging tab and wall mount made installation flexible, and the angled socket kept cords tidy and out of the way. I left it running for days, and it performed flawlessly, never overheating or shutting down unexpectedly.
The compatibility with any heat mat and North American outlets makes it a versatile choice for growers at any level.
Overall, this thermostat gave me peace of mind, knowing my plants’ roots are always at the perfect temperature. Whether you’re a professional or just starting out, it’s a small investment that makes a big difference in plant health and growth success.
Inkbird WiFi Reptile Heat Mat Thermostat IPT-2CH
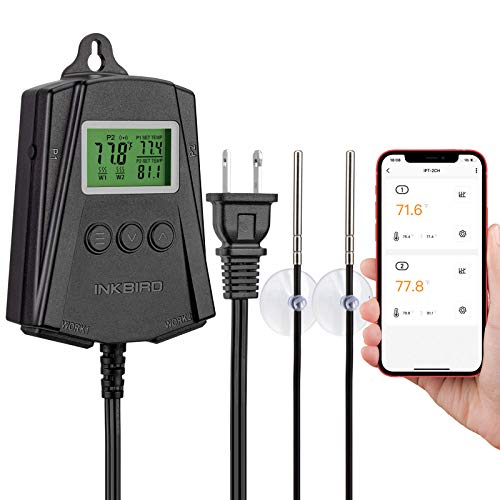
- ✓ Easy remote control via app
- ✓ Independent dual outlets
- ✓ Data tracking and alarms
- ✕ WiFi only supports 2.4 GHz
- ✕ Watt limit per outlet
| Number of Outlets | 2 outlets, each supporting up to 250W |
| WiFi Compatibility | Supports 2.4 GHz WiFi networks |
| Remote Monitoring and Control | Yes, via INKBIRD app |
| Temperature Monitoring | Includes 2 probes for individual temperature control |
| Alarm Features | High/low-temperature alarms and probe error alerts |
| Supported Devices | Suitable for heat mats, heat lamps, and other heaters for reptiles |
One evening, I noticed the heat mat in my reptile enclosure was running hotter than usual, even though I hadn’t changed anything. That’s when I realized how crucial a reliable thermostat is—especially one that I can control remotely.
The Inkbird WiFi Reptile Heat Mat Thermostat instantly caught my attention with its promise of app-based monitoring and control.
The moment I unpacked it, I appreciated the solid build. The two outlets are clearly labeled and work independently, which is perfect if you have multiple terrariums.
The probes are flexible and sit securely, giving me peace of mind that I’m accurately measuring each habitat’s temperature.
Setting it up was straightforward. Plugging in my heat mats, I connected the device to my WiFi network—just a heads-up, it only supports 2.4 GHz.
Once connected, the app interface is clean and intuitive. I could easily adjust temps, set high/low alarms, and view detailed data charts.
It’s surprisingly satisfying to see the temperature trends over time, especially if you’re trying to fine-tune the environment for delicate reptiles like ball pythons.
The app’s alarms are a lifesaver. When my heat mat exceeded the set temperature, I received instant notifications.
Exporting data is simple, which helps if you’re tracking long-term conditions. The device switches on and off automatically, so I don’t have to worry about constantly babysitting my terrariums.
Overall, this thermostat is a game-changer for multi-terrarium setups. It’s reliable, easy to use, and offers remote control, making reptile care more precise and stress-free.
Just keep in mind the wattage limit and WiFi restrictions, but for most home setups, it’s a fantastic choice.
BronzeOx Digital Heat Mat Thermostat 1000W 40-108°F

- ✓ Precise temperature control
- ✓ Easy-to-read display
- ✓ Reliable safety features
- ✕ Slightly pricey
- ✕ Limited to 1000W capacity
| Power Capacity | 1000W (8.3A) |
| Temperature Range | 40-108°F (4-42°C) |
| Display Type | Backlit digital display |
| Safety Features | Overheat protection and temperature calibration |
| Compatibility | Works with various heat mats |
| Cord Length | 6 feet |
Ever since I first set eyes on the BronzeOx Digital Heat Mat Thermostat, I’ve been eager to put it through its paces. It’s sleek, with a backlit display that instantly caught my attention—making temperature readings clear even in low light.
Once I hooked it up to my heat mat, I was impressed by how simple the setup was. The 6-foot cord is plenty long, and the grounded plug fit easily into my outlet without any fuss.
The digital controls are intuitive; I could easily dial in the exact temperature I needed, from 40°F to 108°F.
The real game-changer is the precision. The display updates in real time, so I always know the current temp.
Plus, the safety features like overheat protection and calibration give me peace of mind, especially when working with sensitive plants or reptiles.
Managing the heat was smooth, thanks to its 1000W power. The thermostat kept my seedlings warm and steady, avoiding hot spots or temperature swings.
It’s especially handy for germination or rooting projects that demand consistent warmth.
What I really appreciate is how versatile it is. Whether you’re propagating seeds, caring for reptiles, or fermenting, this thermostat adapts well.
The build quality feels durable, promising long-lasting performance that can handle the demands of indoor gardening or pet care.
If I had to mention a downside, the price is a bit higher than basic models. But considering the safety features and reliability, it’s a worthwhile investment for serious hobbyists or professionals alike.
What Is a Heat Mat Thermostat and How Does It Function?
A heat mat thermostat is a device that controls the temperature of heat mats used for various applications, such as seed germination or animal habitats. This thermostat automatically turns the heat mat on or off based on the set temperature, ensuring optimal conditions.
According to the National Garden Bureau, heat mat thermostats provide accurate temperature regulation for plant growth. They help maintain a consistent environment, which is crucial for successful germination and healthy plant development.
Heat mat thermostats function by utilizing a temperature sensor that detects the current ambient temperature. When the temperature falls below the desired level, the thermostat activates the heat mat. Conversely, it turns off the heat mat once the target temperature is reached, promoting energy efficiency.
The University of Vermont Extension also defines heat mat thermostats as essential tools for gardeners. They ensure that seedlings receive the warmth they need without overheating, which could be detrimental to plant health.
Factors contributing to the need for heat mat thermostats include cold weather, inadequate indoor heating, and specific plant requirements for temperature. Extreme temperature fluctuations can hinder seedling growth and development.
Statistics from the National Gardening Association show that nearly 80% of successful home gardeners use heat mats with thermostats to enhance seedling survival rates, improving their overall gardening success.
The impact of using heat mat thermostats extends to increased plant yields, reduced energy consumption, and greater resource efficiency. This technology supports sustainable gardening practices and enhances food production.
Healthier plants contribute to food security and ecosystem balance, while reducing the reliance on chemical fertilizers. The economic benefits include lower energy costs and higher crop production efficiency.
Examples of impacts include increased vegetable yields in home gardens and improved plant health in commercial nurseries due to the precise temperature control provided by these thermostats.
To address potential issues related to improper temperature settings, the American Horticultural Society recommends using high-quality heat mat thermostats with accurate calibration features. Regularly checking and calibrating devices helps maintain efficiency.
Recommended practices include integrating smart thermostat technologies, utilizing energy-efficient heating mats, and exploring programmable options for automated temperature adjustments. These strategies help ensure optimal environmental conditions for various applications.
Why Is a Heat Mat Thermostat Essential for Reptile and Plant Health?
A heat mat thermostat is essential for reptile and plant health because it accurately regulates the temperature of heat mats used in their habitats. This regulation ensures a stable and appropriate environment that meets the specific needs of reptiles and plants, promoting their growth and well-being.
According to the University of Florida’s Institute of Food and Agricultural Sciences (IFAS), temperature plays a vital role in the life processes of reptiles and plants, affecting metabolism, growth, and overall health. Maintaining the correct temperature range is critical for these organisms to thrive.
Reptiles are ectothermic, meaning they rely on external temperatures to regulate their body heat. If the temperature is too low, it can lead to decreased metabolic functions and weakened immune responses. Conversely, excessive heat can cause stress or even fatality. Similarly, plants require specific temperatures for proper photosynthesis and growth. Temperatures outside of their ideal range can hinder their development or lead to various health issues.
Heat mats are devices that provide warmth to reptiles or plants, simulating natural conditions. A thermostat controls these heat mats, ensuring they do not exceed or drop below the desired temperature. A poorly regulated heat mat can lead to inconsistent temperatures, causing stress in reptiles or slowing growth in plants.
Understanding temperature regulation involves recognizing key terms:
– Ectothermic: Organisms that depend on environmental heat sources.
– Metabolism: The chemical processes that occur within a living organism to maintain life.
Specific conditions requiring the use of a heat mat thermostat include breeding for reptiles, which often requires precise temperature control to trigger mating behaviors. In plants, germination of seeds often occurs within a strict temperature range. For instance, tropical plants may require a consistently warm environment to sprout successfully.
In summary, a heat mat thermostat is crucial to ensure that reptiles and plants receive the proper temperatures they need to maintain health and vitality.
What Key Features Should You Consider When Choosing a Heat Mat Thermostat?
When choosing a heat mat thermostat, consider several key features to ensure optimal performance and convenience.
- Temperature Range
- Accuracy and Precision
- Control Type (manual vs. digital)
- Programming Options
- Safety Features
- Power Rating
- Installation Ease
- Compatibility with Heat Mats
- Display Type
- Brand Reputation
The features mentioned provide a framework for comparing different thermostats. It is important to look at each feature closely to determine which combination best suits your needs.
-
Temperature Range:
The temperature range of a heat mat thermostat describes the minimum and maximum temperatures it can regulate. This range is important for different applications, such as germination or heating reptiles. Most thermostats range from low temperatures, around 70°F (21°C), to higher limits of about 100°F (38°C). A thermostat with a wider range offers more versatility. -
Accuracy and Precision:
Accuracy and precision define how closely the thermostat can maintain the set temperature. An accurate thermostat should be within 1°F (0.5°C) of the desired setting. Precision improves the stability of conditions, which is crucial for temperature-sensitive plants or reptiles. According to a study by the Journal of Environmental Horticulture in 2020, precise temperature control improves plant growth rates. -
Control Type (manual vs. digital):
Control type indicates how users adjust the thermostat settings. Manual thermostats require dials or switches, while digital models offer push-button interfaces and screens. Digital thermostats are often preferred for their user-friendliness and precision. -
Programming Options:
Programming options allow users to set specific temperature schedules. This feature is beneficial for saving energy and accommodating different growth cycles. Some advanced models can be programmed for daily or weekly schedules, allowing for greater flexibility. -
Safety Features:
Safety features are crucial for preventing overheating or equipment failure. Thermostats with automatic shut-off functions or alerts provide peace of mind. Look for devices that meet safety standards such as UL or CE certifications. -
Power Rating:
Power rating indicates the unit’s capacity to handle electrical loads. Ensure that the thermostat can handle the heat mat’s power consumption, which is usually measured in watts. Choosing a thermostat with an appropriate power rating ensures it operates effectively and safely. -
Installation Ease:
Installation ease refers to how straightforward it is to set up the thermostat. Some models offer plug-and-play installation, while others may require more complex wiring. A user-friendly installation process can save time and frustration. -
Compatibility with Heat Mats:
Compatibility is essential for ensuring that the thermostat can effectively communicate with and control the heat mat. Check the specifications of both devices to confirm they work together seamlessly. -
Display Type:
Display type refers to how temperature readings and settings are shown. LCD screens are common for digital models, providing clear visibility. Some units may also have backlight features for low-light environments, which is useful for nighttime checks. -
Brand Reputation:
Brand reputation reflects the reliability and quality of the thermostat. Selecting products from well-known manufacturers can ensure better support, warranty, and product quality. Researching customer reviews and expert recommendations can help inform your decision.
How Do Different Types of Heat Mat Thermostats Compare?
There are several types of heat mat thermostats, and they can be compared based on features such as control type, temperature range, compatibility, and additional functionalities. Below is a comparison table highlighting these aspects:
| Type | Control Type | Temperature Range | Compatibility | Features | Price Range | Power Consumption |
|---|---|---|---|---|---|---|
| Mechanical Thermostat | Manual dial | 50°F – 100°F | Basic heat mats | Simple, low-cost | $15 – $30 | Low |
| Digital Thermostat | Digital display | 32°F – 120°F | Most heat mats | Programmable, precise | $30 – $60 | Medium |
| Smart Thermostat | App-controlled | 32°F – 120°F | Wi-Fi enabled mats | Remote access, scheduling | $60 – $120 | Medium to High |
| Thermostat with Sensor | Digital with sensor | 32°F – 120°F | Advanced mats | Real-time monitoring, alerts | $50 – $100 | Medium |
What Are the Installation Steps for a Heat Mat Thermostat?
The installation steps for a heat mat thermostat involve several key procedures that ensure proper functionality and safety.
- Gather necessary tools and materials.
- Turn off power to the area where the thermostat will be installed.
- Remove the existing thermostat (if applicable).
- Mount the new thermostat box on the wall.
- Connect the wires according to the manufacturer’s instructions.
- Secure the heat mat leads to the thermostat.
- Install the thermostat cover.
- Restore power and test the thermostat.
Before delving into each step, it’s essential to clarify that perspectives may vary based on specific situations, such as the type of heat mat and existing wiring conditions.
-
Gather Necessary Tools and Materials:
Gathering necessary tools and materials is crucial for a successful installation. Standard tools include a screwdriver, wire stripper, drill, and a level. Materials may include the thermostat, heat mat, electrical tape, and appropriate connectors. Preparing these items beforehand can streamline the installation process. -
Turn Off Power to the Area:
Turning off power to the area is a vital safety step. It involves switching off the circuit breaker that controls the thermostat. This action prevents any risk of electrical shock during installation. An estimated 30% of residential electrical accidents occur during installation or repair, underscoring the importance of this precaution. -
Remove the Existing Thermostat:
Removing the existing thermostat is necessary if a replacement is being installed. This step involves detaching the thermostat from the wall and unscrewing the wire connections. Ensure to label the wires if you are switching units, as it helps in confirming connections later. -
Mount the New Thermostat Box on the Wall:
Mounting involves securing the thermostat box to the wall at an appropriate height. Most guidelines recommend placing it 4-5 feet above the floor for accurate temperature readings. A level can be used to ensure that the box is straight during installation. -
Connect the Wires According to Instructions:
Connecting the wires correctly is essential for the thermostat’s proper operation. Each wire type has a dedicated terminal on the thermostat. Following the manufacturer’s color or labeling guide helps to avoid confusion—a common mistake in DIY installations. Familiarity with electrical wiring and color codes is beneficial during this step. -
Secure the Heat Mat Leads to the Thermostat:
Securing the heat mat leads involves connecting additional wires from the heat mat to the thermostat. This connection enables temperature control over the heating element. Ensuring that the connections are tight helps maintain electrical safety and efficiency. -
Install the Thermostat Cover:
Installing the thermostat cover protects the internal components of the device. This step ensures it remains dust-free and enhances aesthetics. Proper installation of the cover also helps prevent accidental tampering with the settings. -
Restore Power and Test the Thermostat:
Restoring the power once installation is complete enables testing of the thermostat. This includes checking the settings and verifying that the heat mat operates as intended. A functional test confirms that your connections were correct and the installation was successful.
These steps provide a comprehensive outline for installing a heat mat thermostat. Following them carefully ensures a safe and effective installation process.
Which Brands Offer the Best Heat Mat Thermostats on the Market?
Several brands offer excellent heat mat thermostats on the market, including Inkbird, Vivarium Electronics, and Titan Controls.
- Inkbird Thermostats
- Vivarium Electronics Thermostats
- Titan Controls Thermostats
- Hydrofarm Thermostats
- Jump Start Thermostats
Notably, each of these brands provides distinctive features and functionalities, catering to different user needs and preferences.
-
Inkbird Thermostats:
Inkbird thermostats are known for their digital displays and accurate temperature control. They allow users to easily set desired temperature ranges. The Inkbird ITC-306T model offers a convenient dual-channel feature to control two heating mats simultaneously. Many users prefer Inkbird for its reliability and user-friendly interface. -
Vivarium Electronics Thermostats:
Vivarium Electronics provides precise temperature management for reptiles or plant growth. Their thermostats include preset temperatures for sensitive species, which many enthusiasts appreciate. The Vivarium Electronics VE-300 provides both heating and cooling options, making it versatile for various setups. The brand is preferred by hobbyists due to its emphasis on ecological design. -
Titan Controls Thermostats:
Titan Controls offers robust thermostats suitable for large-scale horticultural operations. Their models often feature advanced programming capabilities and compatibility with various heating devices. Users cite the Titan Controls Apollo 8 as beneficial for its dual controls and capability to manage different environmental conditions. This brand is favored in commercial applications. -
Hydrofarm Thermostats:
Hydrofarm’s thermostats are recognized for their affordability and straightforward design. They work well for beginners who need basic temperature control. Their Hydrofarm MTPRTC model offers good performance without complexity, making it accessible for novice gardeners. -
Jump Start Thermostats:
Jump Start focuses on seedling germination and plant propagation. Their thermostats feature specific temperature settings ideal for starting seeds. Many users value Jump Start for promoting optimal root growth early in the planting process.
Each of these brands provides various functionalities, catering to different customer needs.
How Can You Optimize Your Thermostat Setup for Maximum Efficiency?
To optimize your thermostat setup for maximum efficiency, consider adjusting temperature settings, utilizing programmable features, maintaining regular maintenance, and strategically positioning the thermostat.
Adjusting temperature settings: Set your thermostat to a comfortable temperature, typically between 68°F and 72°F (20°C – 22°C) in winter and 75°F to 78°F (24°C – 26°C) in summer. According to the U.S. Department of Energy, lowering your thermostat by just 1°F during the winter can save approximately 1% on your heating bill.
Utilizing programmable features: Use a programmable thermostat to automatically adjust temperatures based on your schedule. This technology allows you to set higher temperatures when you are away and lower temperatures when you return. The Energy Saving Trust states that using a programmable thermostat can save you about £100 ($130) annually on energy bills.
Conducting regular maintenance: Regularly clean or replace air filters every 1-3 months. Dirty filters can restrict airflow, causing the heating and cooling system to work harder. A study by the National Renewable Energy Laboratory found that regular filter maintenance can improve system efficiency by up to 15%.
Strategically positioning the thermostat: Place the thermostat away from heat sources, drafty areas, and direct sunlight. Ideal locations include interior walls and central locations in your home. The Energy Star program emphasizes that proper placement can improve thermostat accuracy and reduce energy consumption significantly.
Implementing these strategies effectively can lead to increased energy efficiency and cost savings over time.
Related Post: